
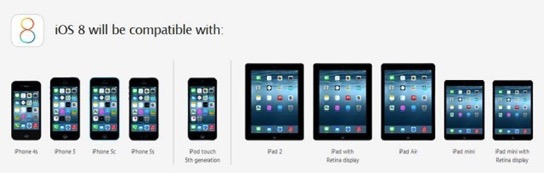
Upgrading to iOS 8: A Step by Step Walkthrough
Once you know your device is eligible, you will want to make sure you have a back up of your iOS device just in case something goes wrong with the update. You can either create a back up over the air and storing it on iCloud or by connecting your device to iTunes and storing the back up on your Mac or PC. I cover how to do this in the tutorial below.
Once you have your backup all set, you can start the update by going to Settings-General-Software Update. It may take a while to download the update and you need to make sure you have at least 5.7 GB of space on your device. If you do not, I cover how to make space for the update in the screencast below.
I found the update to take a couple of hours because I did it on launch day. You will probably be able to do so in much less time. Once you have updated your device you won’t notice much of a change on the surface but there are many innovations and improvements that will make iOS 8 a joy to work with. I’ll probably do a future screencast that goes over some of these changes.
If you have any questions, feel free to leave a comment here or on my Youtube Channel and I’ll do my best to get back to you.

