Using Airdisk as a Time Machine Backup
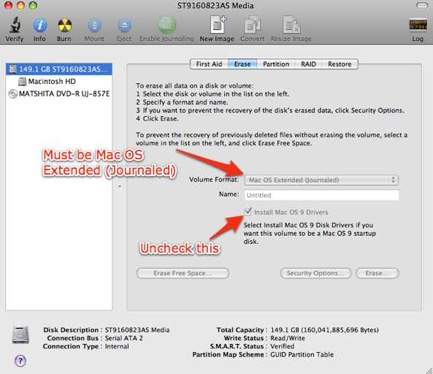
1. Reformat the Hard Drive
I took the 250GB drive I had connected to the Airport Extreme and attached it to my Macpro directly, Using Disk Utility I erased the drive and made sure it was Mac Os Extended (Journaled). If you want to set up partitions you can do so at the same time on the partition tab.
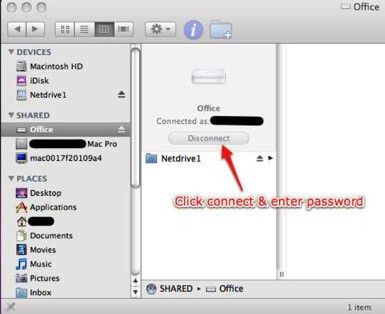
2. Plug the Drive Back Into the Airport Extreme and Mount it
Next I plugged the drive back into the Airport Extreme only, powered it up and waited for the Airport Extreme to show up in the shared section of the sidebar in the Finder. Once it showed up I clicked on it to mount it (if you have a password you will have to put in your password to get it to mount).
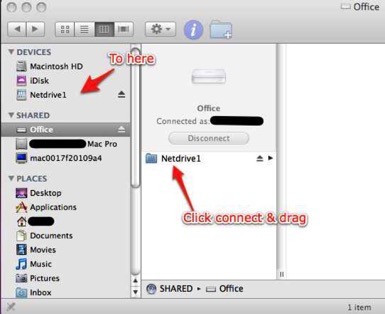
3. Add the Airdisk to the Devices Section of the Finder
Once the drive is mounted you have at make sure it shows up in the devices section of the Finder. Just click on the folder for your Airdisk drive and drag it to the Devices section. Once you do that it will show the drive with a new icon in the devices section. This will allow Time Machine to see the drive.
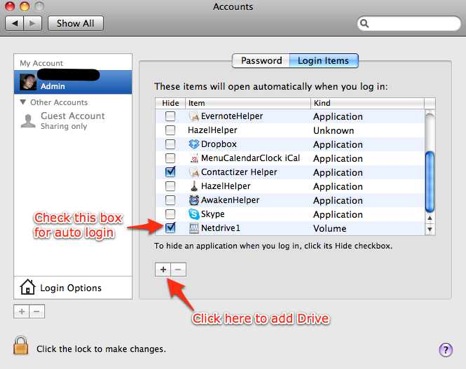
4. Make sure the Airdisk Shows up as a Device Every Time You Login
To make sure the airdisk always shows up when you login, go to System Preferences and click on Accounts. Once in Accounts (you may need to push the lock button in the bottom left corner and give your system login to unlock your preferences) click the tab that says login items. On the list that comes up, click the “+” sign in the bottom left of that window to add an item. Browse to the Airdisk you just added to devices and click add. You will now see it on the list of login items. Make sure the box next to it is checked so that you will automatically mount the Airdisk on login.
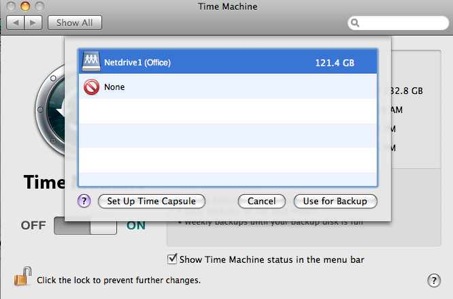
5. Set the Airdisk as your Time Machine Backup
Now go to System Preferences and click on the Time Machine Icon. On the Time Machine screen click Change Disk. You should now see your Airdisk in the list of available Time Machine Volumes. Select the Airdisk. Now Turn Time Machine on if you haven’t already and it will begin to prepare the disk for back up! Remember this will take a long time as you are doing the initial back up of your entire hard drive over the air. It took me 14 hours to back up 116GB of data. You may want to set your Energy Saver settings to not let your computer sleep while the backup is going on (System Preferences-Energy Saver-Set the time to sleep to never).