
iOS 8 Tips & Set Up: Health Kit
One app I have been trying out lately on the health side is Motion X 24/7. This application tracks your sleep patterns, steps, pulse, and other medical data. What I like about the app is that it can track your sleep patterns without the need for a separate bracelet. Just leave the phone on the bed next to you or on your pillow and it gives a detailed analysis of your sleep patterns including recording moments when it hears noise to see if you are snoring. This app integrates nicely with Health Kit as you will see in the tutorial below.
In this screencast tutorial I walk through the new Health Kit feature that is built into iOS 8. I walk through how to set up a Medical ID for emergency situations, how to enter your health data, how to give other health applications access to health kit so they can share your health data, how to track that data on a personalized dashboard, and how to export your data so your doctor can review it.
As always thanks for all of your support! If you find this tutorial helpful please subscribe, like, favorite and share it so others can find it on the internet. If you have any questions or comments feel free to leave them below or on my Youtube Channel and I'll do my best to get back to you.


iOS 8 Tips & Set Up: 1Password & Sharing Service
Well with iOS 8 Apple introduced a new sharing service that allows developers to add services to the sharing menus so they can communicate across applications. One of the applications that really needed this ability was 1Password. 1Password is an application that stores all of your passwords and other confidential information in a secure file that can only be unlocked with your one password that you set up. 1Password solves the problem of remembering all of your passwords or using the same password everywhere so you can remember it which is very insecure, by allow you to only have to remember the one password it takes to open your password vault and then automatically filling in your passwords for you. It is one of the applications I install first on all of my Macs and now with the new updates to iOS 8 will be the first one I install on iOS devices as well.
1Password has an extension that allows you to click a button, type in your one password and it will pre fill all of your login information for you for whatever site you are on. Prior to iOS 8, you had to access 1Password and used its built in web browser to get the same functionality you got on your Mac with Safari. It was a work around and a pain in that you could be in Safari on your iPad and then go to a site with a password and then have to go to one password and use it’s browser to log in (or you could copy the password from 1Password and then go back to Safari and paste it in). This made it difficult to use all of the power and convenience of 1Password on iOS. Now with the new sharing feature, you can use Safari in iOS and click the share button, 1Password, and then type your 1Password and have it fill in your login information for you. Just like it works on the Mac! Also, if you have Touch ID you don’t even have to use your password as you can use your finger print to login!
In this screencast I walk you through how to set up and use 1Password on iOS 8, I also cover some of the built in features of the sharing service and show how that might work with other applications. If you have any questions or comments, feel free to leave them here or on my Youtube Channel.
iOS 8 Tips & Set Up: Family Sharing
Family Sharing allows you to link up to 5 iCloud accounts together in what is called a Family. This family allows each user to have his/her own iCloud accounts but links them together into a family where they have a shared family calendar, a shared family photo share, shared iTunes account to allow for shared apps, and certain restrictions that allows the primary account holder to approve an iTunes purchase and allows for the set up of accounts for children under the age of 13.
In this screencast I cover how to set up family sharing. I also cover all of the settings and walk you through all of the options and each step along the way in setting up your own personal family share. Be aware that you can only set up two family shares a year so if you make a mistake and delete a family, you can only add one more. If you added someone by mistake it is better to delete that person and keep the family share instead of deleting the family completely. Also be aware that children under the age of 13 that are added cannot be deleted and only transferred to another family share.
If you have any questions, feel free to leave a comment here or on my Youtube Channel.
Upgrading to iOS 8: A Step by Step Walkthrough
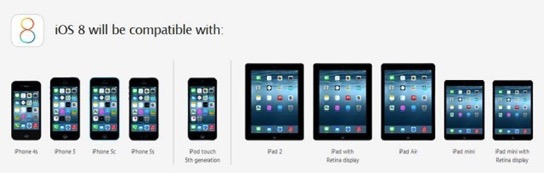
Once you know your device is eligible, you will want to make sure you have a back up of your iOS device just in case something goes wrong with the update. You can either create a back up over the air and storing it on iCloud or by connecting your device to iTunes and storing the back up on your Mac or PC. I cover how to do this in the tutorial below.
Once you have your backup all set, you can start the update by going to Settings-General-Software Update. It may take a while to download the update and you need to make sure you have at least 5.7 GB of space on your device. If you do not, I cover how to make space for the update in the screencast below.
I found the update to take a couple of hours because I did it on launch day. You will probably be able to do so in much less time. Once you have updated your device you won’t notice much of a change on the surface but there are many innovations and improvements that will make iOS 8 a joy to work with. I’ll probably do a future screencast that goes over some of these changes.
If you have any questions, feel free to leave a comment here or on my Youtube Channel and I’ll do my best to get back to you.