macOS Catalina Part 1: Preparing to Upgrade


HOOBS Part 3: Adding Devices to HOOBS

I also walk through the steps to get your HOOBS hub onto the Home App on your Apple devices and how to add any devices you have connected through HOOBS. I then show you how this particular device, the Harmony Hub works with HomeKit.
HOOBS really is a great devices for making Homebridge simple. To have an option to connect all your devices that are not HomKit compatible to HomeKit gives greater access to devices for your home automation needs.
HOOBS Part 2: Device & Software Updates
For those of you who may be wondering what all of this is about, Homebridge is software you can run that includes plugins that will make devices that are not naturally HomeKit compatible visible to HomeKit so you can include them with your other devices and automation through the Home App. Homebridge has worked well for me running on a Mac Mini and I have done a series of screencasts demonstrating how that works. But running a Mac mini all the time as a Homebridge server doesn't make as much sense as running a low power device dedicated to Homebridge which is what makes HOOBS or even a roll your own Raspberry Pi a much better option.
In this screencast I demonstrate how to change out the SD Card on the device and walk through how to update the main software on the device when updates are available.
HOOBS Part 1: Installation & Set Up
For those of you who may be wondering what all of this is about, Homebridge is software you can run that includes plugins that will make devices that are not naturally HomeKit compatible visible to HomeKit so you can include them with your other devices and automation through the Home App. Homebridge has worked well for me running on a Mac Mini and I have done a series of screencasts demonstrating how that works. But running a Mac mini all the time as a Homebridge server doesn't make as much sense as running a low power device dedicated to Homebridge which is what makes HOOBS or even a roll your own Raspberry Pi a much better option.
In this screencast I demonstrate the basic installation and set up of a HOOBS box. It was a very easy process and having the ability to manage it through a web browser on my local network is a great option. Check it out for yourself and if you are interested you can check out getting your own over at www.hoobs.org.
Smart Home Part 12: Harmony Bridge App

One the application is running, you will see each Harmony Hub and all of your activities will show as switches instead of showing up as separate HomeKit devices. This then allows you to use your Harmony Hubs in your HomeKit automation and with Siri.
macOS Mojave Server Part 11: Profile Manager Preference Menu Items
macOS Mojave Server Part 10: Profile Manager macOS Device Profiles
macOS Mojave Server Part 9: Profile Manager iOS Device Profiles
macOS Mojave Server Part 8: Profile Manager Users & Groups
macOS Mojave Server Part 7: Profile Manager Overview
In this screencast tutorial I do an overview of the Profile Manager Interface. I walk through each section and talk about it’s function and how it is used to manage your users and devices.
macOS Mojave Server Part 6: Profile Manager-Mac Device Enrollment
In this screencast I cover how to enroll a macOS device into profile manager on macOS Mojave Server. I cover how to install the trust profile and the remote management profiles that add your Mac devices to profile manager so you can begin managing your Macs through the MDM interface.
macOS Mojave Server Part 5: Profile Manager-iOS Enrollment
In this screencast tutorial I cover how to enroll your iOS devices into Profile Manager so you can begin to manage them through the MDM service. I cover how to install the trust profile and the remote management profiles to add your iOS devices to Profile Manager.
Smart Home Part 11: Fuse-Home & Music Control App

Smart Home Part 10: Ecobee Switch+ Install & Set Up
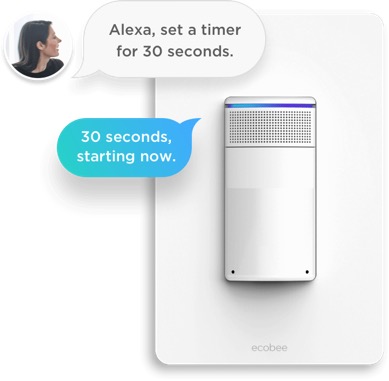
In this screencast I cover the installation of the switch and walk through the steps to setting it up an managing it on the Ecobee App.
macOS Mojave Server Part 4: Remote Access Set Up
In this screencast tutorial I cover how to set up your server for remote access. I walkthrough changing the hostname and setting up your DNS at your domain provider to point to your server so you can access the Profile Manager service remotely.
macOS Mojave Server Part 3: Profile Manager Set Up
In a future screencast I will cover how to use Open Directory and when you might want to do that. I will also walk through the features of Profile Manager and how to use it to manage your own devices.
macOS Mojave Server Part 2: New Installation
In future screencasts we will cover each of the features in depth so you can use and control your how home server.
macOS Mojave Part 2: Software Update & Screenshot

macOS Mojave Part 1: Finder & Desktop Updates
macOS Mojave Server Part 1: Upgrade Walk Thru
For those of you already running server and wondering what will happen to your existing set up after you upgrade to Mojave, I am doing this walk thru so you can see ahead of time how Apple handles the transition. As you will see you will want to make sure you have a clone of your server if you want to try this but in the end you will move likely want to stay with your previous install as all of your services will stop working.
I will continue to look at other options for server software and will also walk through the Mojave version of server for those who want to use it in conjunction with other services to create the server package that is best for you.
Smart Home Part 9: Nest Hello Doorbell Walk Thru
This is a part of an ongoing series I am doing on setting up my smart home and working through the issues that come up with the installation and set up of devices that are not always designed to talk to one another. I will also be showing how to do some home automation once those devices are installed so watch for future screencasts outlining this.
Smart Home Part 8: Nest Protect Install & Set Up
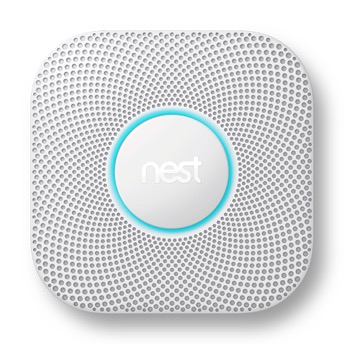
This is a part of an ongoing series I am doing on setting up my smart home and working through the issues that come up with the installation and set up of devices that are not always designed to talk to one another. I will also be showing how to do some home automation once those devices are installed so watch for future screencasts outlining this.
As always thanks for your support and please subscribe, like, share, and favorite these videos so others can find them on the internet.
Smart Home Part 7: Homebridge Harmony Crash Fix

I show you the cause of the crash and how to fix it on your Mac. Then I go into an automation I set up to fix the issue when I am not at my Mac and need to use my iOS device.
I want to thank you all so much for your support even when I have been MIA lately. My wife had hip replacement surgery, two of my boy started college for the first time and we had to move them in, and I’ve had other projects come up that have taken my time. I am not abandoning the channel even though Apple has chosen to retire macOS server as I have a lot of other interests in doing screencasts to related to the Mac and technology in general.
I couldn’t do this without your support and encouragement. So thanks again and I look forward to producing more content!
YouTube Channel Update: Where Have I Been?
If you have any feedback on software or topics you would like me to cover please leave them in the comments on my channel or email me at todd@toddolthoff.com.
Thanks so much for all of your support. This community has been awesome to me and I am grateful that you view my content on a regular basis! You are the best subscribers on the internet!
macOS Server Replacement Part 2: VPN Enabler
macOS Server Replacement Part 1: DNS Enabler
In this screencast I look at an application called DNS Enabler by Cutedge Systems (https://cutedgesystems.com). This application puts a GUI interface to setting up and enabling the DNS Server that is built into macOS. I walk through how to set it up and transfer your DNS settings from macOS to the DNS Enabler.
OwnCloud Part 7: iOS Client Set up
If you haven’t already set up your own OwnCloud Server on your Mac you may want to watch the other videos in this series to get started.
OwnCloud Part 6: Mac Client Set Up
If you haven’t already set up your OwnCloud server on your Mac, you may want to review my previous videos that walk you through the process. As always thanks for your support and feedback.
OwnCloud Part 5: Contacts & Calendars
OwnCloud Part 4: External Storage
In this screencast I show how to set external storage up and demonstrate how to connect to WebDAV and what it looks like to add files to you webDAV folder and see how they load to OwnCloud itself.
Smart Home Part 6: LaunchControl Keep Homebridge Running
I have received a lot of questions about how to keep homebridge alive when a Mac reboots or the service crashes for some reason. When this happens it can leave you without access to your non HomeKit devices and cause a lot of issues. To help solve that LaunchControl is a front end for controlling launchd which is used to auto launch applications or services and in this case I show you how to set it up to keep homebridge running at all times.
OwnCloud Part 3: File Sharing
OwnCloud Part 2: Settings & Open Directory
Smart Home Part 5: Homebridge Harmony Hub Set Up
If you haven’t viewed my previous screencasts please take a look at these below first before you view this screencast as I am building on the previous one’s:
Smart Home Part 1: Homebridge Installation & Set Up: https://youtu.be/iOgtOG4Nvc8
Smart Home Part 2: Homebridge Nest Device Set Up: https://youtu.be/T8vi4cN-JtE
Smart Home Part 3: Apple HomePod Review: https://youtu.be/KRDKwRERSkA
Smart Home Part 4: Logitech Harmony Hub Install & Set Up: https://youtu.be/-eKSaTD6J5I
Smart Home Part 4: Logitech Harmony Hub Install & Set Up
In this screencast I cover the installation and set up of the Harmony Hub to get you up and running with the device. In a future screencast I will cover how to integrate the harmony hub into your smart home set up.
As always thanks for you support. Please subscribe to get more of my content and like and favorite these videos so others can find them.
OwnCloud Part 1: Installation & Set Up
I cover how to install and use an application called Docker (https://www.docker.com) to set up a virtual machine to run your OwnCloud Server inside. I also cover how to set up OwnCloud and get it launched and ready to configure.
If you find this content helpful please subscribe and hit that like button. Also if you have ideas for other shows or questions feel free to leave them below.
Smart Home Part 3: Apple HomePod Review
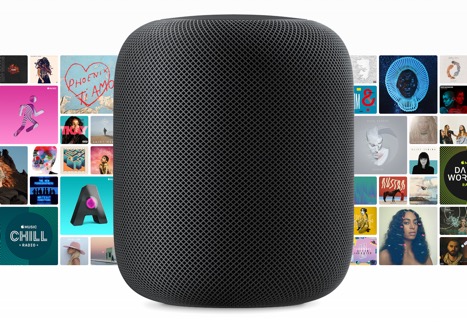
The HomePod is Apple’s foray into the smart speaker market which has been dominated by Amazon’s Alexa and the Google Home. Where Apple is different is their attempt to selling the music side of the speaker first with voice assistant technology added in. This comes at a premium as the speaker comes at a $349 price tag and which is their only option while Echo and Google Home have a cheaper entry point. But once you listen to it you can hear that Apple has put a lot of tech into the HomePod. The other advantage is being able to use Siri with Homekit out of the box is a huge plus and is of particular interest to our topic of looking at smart home technology to help us control our smart home devices.
In this screencast we will walk through he unboxing, set up and testing of the HomePod to see if it fits in your own Smart Home set up.
As always thanks for your support. If like my screencasts please like, favorite and share them with others. As always thanks for all your support.
macOS Server WebDAV Replacement

In this screencast I cover an application that takes care of an issue users of the current version of macOS Server have been having and that is connecting to their WebDAV Shares. Apple deprecated the service in the most recent release and it has caused some issues for many people. I found a great application that takes care of all the headaches of configuring the server and that is WebDAVNav Server by Schimera Pty Ltd.
In this screencast I cover how to set the server up, how to connect to it on your local network and remotely using Safari and Documents by Readdle Software. They also have a WebDAV Nav+ App which let’s you browse your shares as well on iOS devices.
As always thanks for your support. Please subscribe like and share so others can find these screencasts.
macOS Server: The Future of Apple's Server Product
-Calendar
-Contacts
-Messages
-VPN
-Websites
-Wiki
-DHCP
-DNS
-NetInstall
They did provide potential replacements for each service in their support article which means that more and more of our server builds seem to be moving towards SaaS or software as a service types of solutions instead of one nicely bundled software package.
In this screencast I walk through those changes with some thoughts on timing and some things you can do now to protect yourself from having your server go obsolete before you want it to in spring of this year. I also talk about the fact that I will be doing screencasts on the options you have going forward to help you make the transition.
It is a sad day for those of us who have loved the server interface and all that it had to offer but it is also an opportunity to learn new things and new ways of running server services on our Macs.
As always I will be here to help as best I can and will continue bringing your screencasts to help you learn to do more things with your Mac including server replacements, more on smart home set ups, and Apple software and hardware tutorials and reviews.
Thanks for all your support! I love exploring new software for Macs and this presents another great opportunity to grow!
High Sierra Server Part 11: Network Configuration: Non Apple Routers
High Sierra Server Part 10: Network Configuration-Apple Routers
High Sierra Server Part 9: Clean Install
Smart Home Part 2: Homebridge Nest Device Set Up
Smart Home Part 1: Homebridge Installation & Set Up
Homebridge is a lightweight server that runs in the background and acts like a bridge that Homekit can connect to and then display the feature of that device so you can control them with Siri or Homekit.
In this screencast I cover the initial installation and set up of Homebridge. In future screencasts I will cover how to set up specific devices like Nest devices to run on Homekit through Homebridge. I also plan to do a series on smart home devices and how to set them up for those who want to have an integrated smart home that can be controlled with your voice, a phone or other devices.
High Sierra & Server 5.4 Part 8: New Home Folder Set Up
Apple has moved the setting up of home folders into the server app in the Users tab. I walk through how to choose where to set up a home folder, how to set that home folder up, and how to select it to create the network home folder on your server.
As always thanks for watching! I hope these screencasts are helping you in your own server set up and if you find this video helpful please like, favorite and share it with others. Thanks for all your support!
High Sierra & Server 5.4 Part 7: Access Shares Remotely on iOS with VPN
In this screencast I show you how to set up VPN on your iOS device and use that to appear as if you are on your local network. This then will allow access to your file shares using an application like Documents by Readdle on the go.
If you find this screencast helpful, please subscribe, like, and add it as a favorite so others can find it. Thanks for all your support.
High Sierra & Server 5.4 Part 6: FTP Replacemet with SFTP
In this screencast I cover how to set up SFTP which stands for Secure File Transfer Protocol which allows for FTP transfers over the SSH protocol which is more secure as it encrypts your data instead of sending it in the open. I cover the set up and how to add and retrieve files from your web server using the Terminal and Transmit or other FTP type applications.
As always thanks for your support. If you found the video helpful please subscribe and hit the like button below. Hope you have a great week!
High Sierra & Server 5.4 Part 5: WebDAV Set Up
In this screencast I walk through how to use the command line wfsctl command to set up and manage WedDAV on your server. I also walk through each of the options available to manage it and show you how to connect to your shares via WebDAV on an iOS device.
As always thanks for your support. Please Subscribe, like and favorite this video to help others find it on the internet.
High Sierra & Serve 5.4 Part 4: File Sharing New Location
Luckily they did include the more advanced features of file sharing like ACL’s in the Server App itself. I will cover all of the changes to the file sharing service and a work flow for setting up your file shares in System Preferences and managing your permissions in the Server App.
As always thanks for your support! If you could subscribe, like and favorite this video it would help a lot!
High Sierra & Server 5.4 Part 3: Caching Server New Location
I cover how to set up the caching service and all of the features included. There is also a hidden advanced options menu that I show you how to access and cover each of the items included in that hidden menu.
As always thanks for your support! Please like and subscribe to the channel for updates on future screencasts.
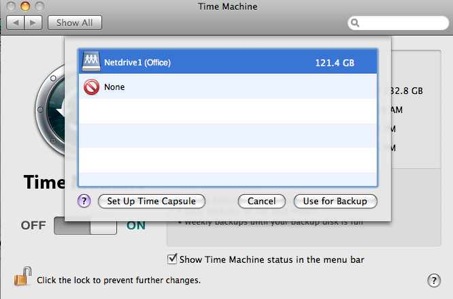
High Sierra & Server 5.4 Part 2: Time Machine New Location
The benefits of having Server for doing network Time Machine back ups has now moved out of the server and into the Mac itself. This solves a problem created Apple getting out of the router business which means that Time Capsules will not be developed anymore which leaves network back ups from Apple in the cold as far as Time Machine goes. By moving the service to system preferences so every Mac gets access to it, allows them to keep that part of the service and move out of the router business.
High Sierra Server Part 1: Server Upgrade
A word of caution! There are some significant changes to the server app with previous features being moved out of the server app to other places which means we don’t know how they function yet and how smooth a transition it will be during the upgrade. I would hold off on upgrading until I have had a chance to walk thru those features so you have a choice as to how you want to proceed with your own server.
macOS High Sierra Part 2: Upgrad Prep & Walk Thru

This upgrade does add the Apple APFS File system which is automatically upgraded on all SSD only Macs but is not added to Fusion drive or regular Hard Drive set ups.
Also if you are running macOS Server you will want to hold off on the upgrade until you see the upgrade screencast I will do showing you the changes so you can decide if the upgrade is for you.
iOS 11 Part 1: Upgrade & Set Up
I walk through each of the segments of the upgrade process and show you what I see on my screen. So far I am very impressed with the results and love what Apple has done to make the iPad more like a desktop in terms of multitasking and interactions between applications like drag and drop. I use my iPad Pro far more than any of my other Apple devices on a day to day basis save my iPhone. It is the most portable option and now is slowly taking care of the things that bothered me about it in comparison to my Mac!
macOS High Sierra Part 1: Safari, Notes, & Mail
In this screencast I look specifically at Safari, Notes, and Mail and some of the changes you can expect in each. Each of these applications have little touches done to them that remove some of the friction experienced in previous versions. Because it is a refinement, those features are not always obvious so I hope to show you what those changes look like so you can start using them right away on launch day.
File Manager Showdown Part 3: Pathfinder 7

Pathfinder 7 includes so many features that I tried to give as much of an overview as I could but I know there are still features I didn’t have time to cover. The screencast gives you a great idea if Pathfinder is for you and covers the major features that make it unique in this space.
File Manager Showdown Part 2: Forklift 3

I will be looking at other file management software packages in this series to help you determine which one is right for you.
Thanks in advance for the support. Please subscribe, like, favorite and share these screencasts as they help others find them on the internet and help me know that you are enjoying them and want me to continue producing them.
File Manager Showdown Part 1: Transmit 5

Transmit 5 by Panic (https://panic.com/transmit/) is a very well designed and pretty file transfer application. It has everything you could want in a file transfer application including support for all of the major protocols and web services and features like file syncing, sync browsing, droplets for quick uploading, and many more. In this overview there are some features I wasn’t able to cover but we get most of basics down in this screencast.
Transmit does have an iOS application that syncs up with the desktop app making it seamless experience between the two. In fact of the applications we will review, Transmit is the only one with an iOS counterpart.
I will be looking at other file management software packages in this series to help you determine which one is right for you.
Thanks in advance for the support. Please subscribe, like, favorite and share these screencasts as they help others find them on the internet and help me know that you are enjoying them and want me to continue producing them.
Plotagraph+ Photo Animator

As always thanks for watching. Please subscribe and like, favorite and share this video if you found it helpful.
Thanks as always for your support!
macOS Sierra Server Part 35: Creating Custom NetRestore Images
As special thanks to Jeffrey Battersby who has a great series on NetInstall over on Macworld (http://www.macworld.com/article/3073565/macs/how-to-master-the-netinstall-service.html)
As always thanks for watching! Please subscribe if you find the content helpful as it does help with people finding these screencasts and for me making more. Also, please like, favorite, and share these videos to get them out to others who might need them.
Thanks for your support and have a great week!
macOS Sierra Server Part 34: Creating Custom Packages for NetRestore
I walk through how to use these applications to set up custom packages that we will use in the next screencast to create the image we want to use for our netRestore service.
Transmit iOS: My Favorite FTP App
I'm also working on a desktop application showdown for File Managers that will include the Mac version of Transmit and other great FTP Applications. You can take a look at the Transmit 5 tutorial Here.
macOS Server Part 33: NetInstall
If you would like me to consult with you in setting up your server I can do that remotely. Just email me at todd@toddolthoff.com.
If you find this tutorial helpful please subscribe, like, favorite and share it so others can find it on the internet. If you have any questions or comments feel free to leave them below and I'll do my best to get back to you.
Ulysses: My Favorite Writing App for Mac

Ulysses is a markdown text editor that is a one stop shop for all of your writing needs. It includes simple to use writing tools that include clickable mark down prompts, an organizational library to keep all of your writing in one place, live preview of your markdown, various writing styles and an export feature making it easy to get your text into whatever format you need from plain text to html to epub. Check out this screencast and you will see why it is one of my favorite writing tools!
As always thanks for watching. If you find this video helpful please like, favorite, share and subscribe to help get the word out to others who may benefit from this walkthrough.
As always thanks for your support!
macOS Sierra Server Part 32: DHCP
If you would like me to consult with you in setting up your server I can do that remotely. Just email me at todd@toddolthoff.com.
If you find this tutorial helpful please subscribe, like, favorite and share it so others can find it on the internet. If you have any questions or comments feel free to leave them below and I'll do my best to get back to you.
macOS Sierra Server Part 31: FTP
As always thanks for watching! If you have any questions or comments feel free to leave them below and I’ll do my best to get back to you.
If you would like me to consult with you in setting up your server I can do that remotely. Just email me at todd@toddolthoff.com.
If you found this screencast helpful please like, favorite and share it so others can find it on the internet. Thanks so much for all of your support
iStat Menus: My Favorite Mac Hardware Monitoring App
This application includes the ability to Monitor your CPU & GPU, Monitor your Mac’s Memory, Monitor your Mac’s Drives, Monitor the Network access of your Mac, Monitor your Mac’s sensors, Monitor your Mac’s battery, & Other Menu customizations.
This really is a great application and one I use on a regular basis.
As always thanks for watching and for your support. If you like this video please like, favorite, or share it with others. Also please subscribe to keep up on my latest video tutorials.
macOS Sierra Server Part 30: Wiki
As always thanks for watching! If you have any questions or comments feel free to leave them below and I’ll do my best to get back to you.
If you would like me to consult with you in setting up your server I can do that remotely. Just email me at todd@toddolthoff.com.
If you found this screencast helpful please like, favorite and share it so others can find it on the internet. Thanks so much for all of your support
PopClip: One of My Favorite Menubar Apps
PopClip has a large library of exertions that can be added to the application to help you customize your menus with the extensions that fit you and your workflow best. PopClip has naturally shown up in a number of my screencasts and I have had people ask me about it all the time so I figured I’d do a screencast to show you what I am using.
As always thanks for all your support. If you have any questions or comments feel free to leave them below.
If you find these videos helpful please like, share and favorite them and as always please subscribe to see more of my content. You can also find me at www.toddolthoff.com or you can email me at todd@toddolthoff.com.
macOS Sierra Server Part 29: Websites
As always thanks for watching! If you have any questions or comments feel free to leave them below and I’ll do my best to get back to you.
If you would like me to consult with you in setting up your server I can do that remotely. Just email me at todd@toddolthoff.com.
If you found this screencast helpful please like, favorite and share it so others can find it on the internet. Thanks so much for all of your support
macOS Sierra Server Part 28: Software Update
In this screencast I cover how to set up and run the Software Update Service from your Server including downloading and enabling updates for your Macs that come from your server instead of Apple’s servers.
As always thanks for your support. If you find these videos helpful please subscribe, like, favorite and share them so others can find them on the internet.
Thanks again and have a great week!
BusyContacts: My Favorite Contacts App
As always thanks for the support. We hit over 20,000 subscribers yesterday and I am super excited to help you do more things with your Mac and iOS devices.
If you find this video helpful please subscribe, like, favorite and share it so others can find it on the internet.
Thanks again and have a great week!
macOS Sierra Server Part 27: Profile Manager Devices & Groups
As always thanks for watching! If you have any questions or comments feel free to leave them below and I’ll do my best to get back to you.
If you would like me to consult with you in setting up your server I can do that remotely. Just email me at todd@toddolthoff.com.
If you found this screencast helpful please like, favorite and share it so others can find it on the internet. Thanks so much for all of your support
macOS Sierra Server Part 26: Profile Manager Users & Groups
As always thanks for watching! If you have any questions or comments feel free to leave them below and I’ll do my best to get back to you.
If you would like me to consult with you in setting up your server I can do that remotely. Just email me at todd@toddolthoff.com.
If you found this screencast helpful please like, favorite and share it so others can find it on the internet. Thanks so much for all of your support
Spark: My Favorite Mac Email Client
In this screencast I cover all of the features of Spark including setting up accounts, working with favorites and folders, adding signatures and swipe gestures to speed up your email processing, and a lot more.
If you have any questions or comments feel free to leave them below and if you find this video helpful please like, favorite, share and subscribe to the channel so others can find it.
As always, thanks for all your support!
macOS Sierra Server Part 25: Profile Manager Overview
As always thanks for watching! If you have any questions or comments feel free to leave them below and I’ll do my best to get back to you.
If you would like me to consult with you in setting up your server I can do that remotely. Just email me at todd@toddolthoff.com.
If you found this screencast helpful please like, favorite and share it so others can find it on the internet. Thanks so much for all of your support
Trickster: One of My Favorite Menubar Apps
Trickster allows you to have quick access to your recently used documents, folders and applications and can also track certain folders and display items you define such as all pdf’s or jpeg’s. This increases productivity and saves time from searching to find specific files or folders you have been working on.
I hope you like this application as much as I do! As always thanks for watching and be sure to subscribe. I am looking to do a tutorial every Monday and Friday now to bring you best of technical Mac tutorials on things like macOS Server and then regular Mac and iOS applications. If you have any suggestions or your own favorite apps, be sure to leave a comment below.
If you find these videos helpful please subscribe and be sure to share these with your friends by liking, favoriting, or sharing.
macOS Sierra Server Part 24: Profile Manager iOS Enrollment
I cover how to install the certificates including the order of installation and what you can do with your iOS Device from the my devices portal.
As always thanks for watching! If you have any questions or comments feel free to leave them below and I’ll do my best to get back to you.
If you would like personal help in setting up your server, feel free to contact me at todd@toddolthoff.com.
If you find these tutorials helpful please like, favorite and/or share them so others can find them.
Bartender 2: One of My Favorite Menubar Apps

Bartender 2 is a unique menubar application that cleans up your menubar. It allows you to hide certain menubar applications until you need them. With a click or keyboard shortcut the Bartender menubar shows up and displays all your hidden menubar items giving your more room on your menubar which is especially needed for laptops or smaller screens the don’t allow as many menubar apps to be displayed. It also has a built in search for your menubar items and various ways to customize and organize your menubar applications.
I hope you like this application as much as I do! As always thanks for watching and be sure to subscribe. I am looking to do a tutorial every Monday and Friday now to bring you best of technical Mac tutorials on things like macOS Server and then regular Mac and iOS applications. If you have any suggestions or your own favorite apps, be sure to leave a comment below.
If you find these videos helpful please subscribe and be sure to share these with your friends by liking, favoriting, or sharing.
Thanks as always for all your support and for being an incredible Mac Community!
macOS Sierra Server Part 23: Profile Manager Mac Enrollment
As always thanks for watching! If you have any questions or comments feel free to leave them below and I’ll do my best to get back to you.
If you would like personal help in setting up your server, feel free to contact me at todd@toddolthoff.com.
If you find these tutorials helpful please like, favorite and/or share them so others can find them.
Fantastical 2 Part 2: Preferences & Menubar App

As always thanks for you support! I will be continuing the server seres as well but wanted to put together some new content for those of you who have mastered Server from previous screencasts.
If you find the screencast helpful please like, favorite, share and subscribe to my channel so others can find it on the internet.
Fantastical 2 Part 1: Overview
Fantastical 2 started out as an iOS app and then made it’s way over to the Mac. It uses natural language and then automatically parses it into a calendar event. It also has some great views of your calendar and some features that let you set up particular calendar sets for various environments. In part 1 I cover the overall interface, how to set up calendars and calendar sets, and how to add events to your calendars by using the keyboard and dictation. In part 2 I will cover some of the other preferences you can set and the menu bar application that comes built into Fantastical 2.
As always thanks for you support! I will be continuing the server seres as well but wanted to put together some new content for those of you who have mastered Server from previous screencasts.
If you find the screencast helpful please like, favorite, share and subscribe to my channel so others can find it on the internet.
macOS Sierra Server Part 22: Profile Manager Set Up
As always thanks for watching. If you found this video helpful please like, favorite and share it with others.
If you have any questions feel free to leave them below.
macOS Sierra Server Part 21: Mail
If you find this tutorial helpful please subscribe, like, favorite and share it so others can find it on the internet. If you have any questions or comments feel free to leave them below and I'll do my best to get back to you.
Thanks for watching!
macOS Sierra Server Part 20: Messages
As always, thanks for watching! If you enjoyed the tutorial please like, favorite and share its others can find it.
macOS Sierra Server Part 19: Calendars
As always thanks for watching. If you have any questions feel free to leave them below.
If you found this screencast helpful, please like, favorite and share it so others can find it on the internet. Thanks for all your support
macOS Sierra Server Part 18: Contacts
As always thanks for your support. If you have any questions feel free to leave them below and I'll do my best to answer your questions.
If you find this tutorial helpful, please like, favorite or share this tutorials so others on the internet can find it. Thanks for all your support
MacOS Sierra Server Part 17: Caching Server
If you find this tutorial helpful please like, favorite and share it so others can find it on the internet. If you have any questions or comments feel free to leave them below and I'll do my best to get back to you.
Thanks for watching!
Things Part 2: Workflows (My Favorite Task Management App
I cover how to integrate things into the charing services and widgets on your Mac. I also show how to set up sync and use Things between your Mac and iOS devices including integrating Siri into your workflow.
As always thanks for you support! I will be continuing the server seres as well but wanted to put together some new content for those of you who have mastered Server from previous screencasts.
If you find the screencast helpful please like, favorite, share and subscribe to my channel so others can find it on the internet.
MacOS Sierra Server Part 16: VPN
If you find this tutorial helpful, please like, favorite and share it so others can find it on the internet.
If you have any questions, feel free to leave a comment and I'll do my best to help you. Thanks for all your comments and support!
MacOS Sierra Server Part 15: Time Machine
As always thanks for watching! If find these tutorials helpful please like, favorite, and share them so others on the internet can find them.
MacOS Sierra Server Part 14: Connect to File Shares-iOS
As always thanks for watching! If find these tutorials helpful please like, favorite, and share them so others on the internet can find them.
MacOS Sierra Server Part 13: Connect to File Shares-Mac
Sorry for the delay in getting a show out last week. I had my licensing exams this past week which I had to study for and got behind (I did pass though so yay for that!).
As always thanks for watching! If find these tutorials helpful please like, favorite, and share them so others on the internet can find them.
MacOS Sierra Server Part 12: File Sharing Permissions
As always thanks for watching. If you have any questions feel free to leave them below and I'll do my best to answer them.
If you found this screencast helpful, please like, favorite, and share it so others on the internet can find it. Thanks for all your support
Things Part 1: My Favorite Task Management App
Today I start with my favorite Task Management Application called Things by Cultured Code. Things is a simple and elegant task management solution that fits my workflow. It has just enough organization and features but not too many to get me caught up spending too much time setting up my task management system instead of actually getting things done. I will cover things in a multiple part series to show you how to use the app and see how it plays out in a real workflow.
As always thanks for you support! I will be continuing the server seres as well but wanted to put together some new content for those of you who have mastered Server from previous screencasts.
If you find the screencast helpful please like, favorite, share and subscribe to my channel so others can find it on the internet.
MacOS Sierra Server Part 11: File Sharing
As always thanks for watching. If you have any questions feel free to leave them below and I'll do my best to answer them.
If you found this screencast helpful, please like, favorite, and share it so others on the internet can find it. Thanks for all your support
Eero Mesh Wireless Review
I live in a home with three boys who are all tech savvy like their dad. They love to play online games and stream video at the same time. This takes a big toll on my network and I was having some major issues with slower speeds down by my television which has an Xbox One, AppleTV, Roku, Yamaha Receiver and Panasonic TV connected to an old AirPort Extreme Base Station what was extending my wireless network. Having read about mesh networks and after hearing that Apple was most likely no longer developing their router business, I decided to go on a search for a mesh system that would take care of all of my issues.
I read reviews about the various systems and had narrowed my search down to the Orbi by Netgear which was getting some great reviews for speed and throughput, and the Eero which was highly recommended by Dave Hamilton from the Mac Observer and by David Sparks and Katie Floyd over at the Mac Power Users Podcast. After much research and looking at the options, I decided to go with the Eero due to it's frequent updates, great customer service (which I called before I bought) and it's great configuration app (though it does have an issue which I hope will be resolved in the next update). I was able to get the Eero three pack for $100 off and had some Best Buy gift cards which brought the price down for me. It is the more expensive option at retail so keep that in mind as you research the various solutions.
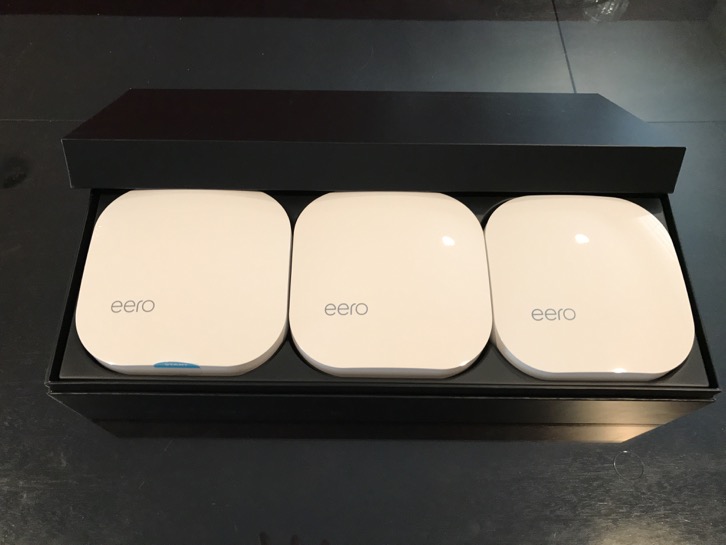
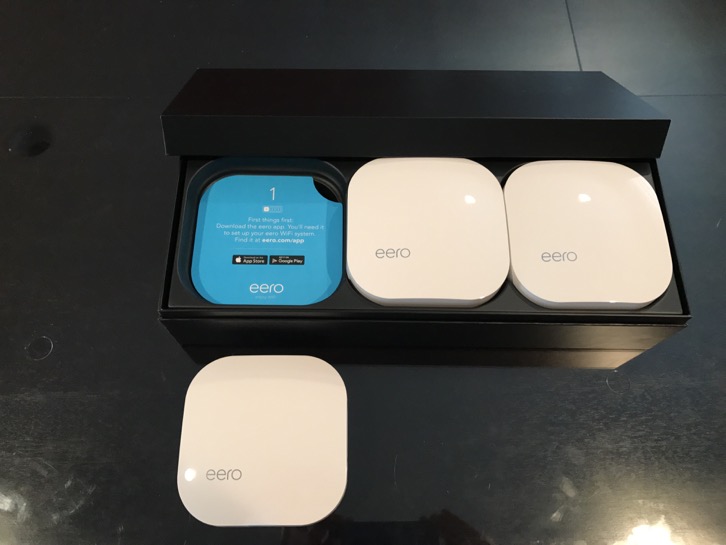
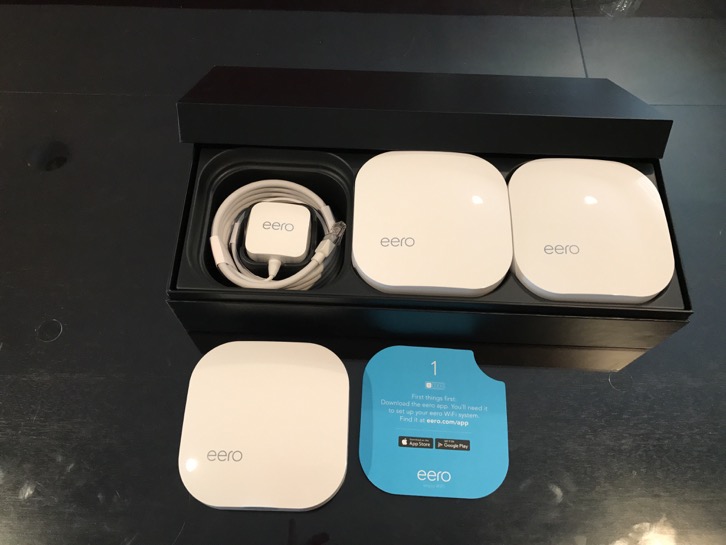
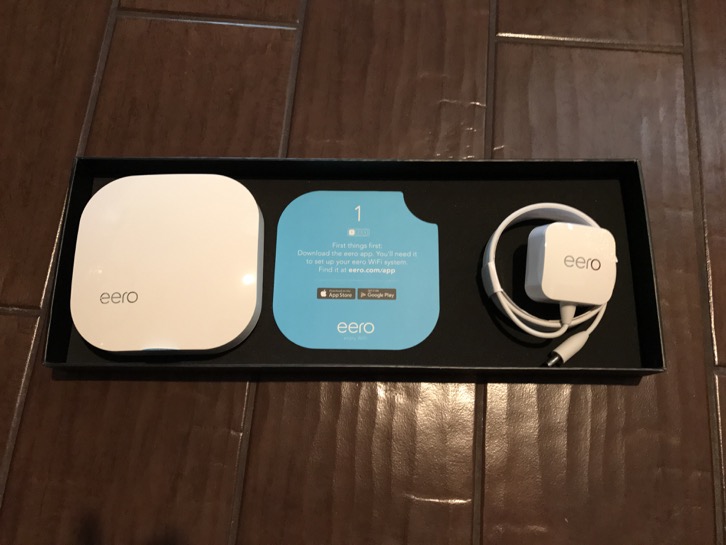
Unboxing
The Eero's packaging is on par with something you would get from Apple. The nice slide out box with foam padding to protect the top of the Eero's along with the customized cut outs for each Eero that include a cover telling you more about the Eero and a premium looking power cable with an Ethernet cable thrown in really make a great first impression. The whole package screams premium device and does raise your expectations from the start.
Installation and Set Up
Installation of the Eero's was a snap. You install the application on your iPhone or other device, create a login, verify your login with a code that is texted to you and then follow the onscreen directions to setting up your Eero network. The recommendation is that each Eero is either in line of site or that you limit the obstructions between Eeros to create the best coverage for your network. In my home my modem is on the second floor next to my computer desk on one side of my home. I put an Eero there, plugging in the modem to the Eero. I added a Netgear switch as, one of the disadvantages of the Eeros is that they each only have two ethernet ports. With the switch connected I could add all of my devices on desk but it does add an additional item to have on my desk.
Once the cables were all plugged in, I plugged the modem and the Eero back in and let them boot up. As soon as the devices were booted up, the app located the Eero and started the network set up. It was a breeze to set up my new network and the wizard made it something that my dad could do with little fuss or risk of getting stuck.
Once the network was set up the app asked if I had other Eeros to set up. I plugged the next Eero in downstairs in my front room right below my first Eero. The Eero system uses the location of your device that has the app to automatically locate the second and third Eeros. Once the second Eero booted up the app found it and started configuring it. Once done I was greeted by a screen that said, "Boom! Your Eero is set up." I then went and located the third Eero by myth television where I was having the issues. I went through the same process and got the same result. The app does a good job of helping you know if you are locating the Eero in a place that is optimized for your home. In a set up I did for my dad, we were told a couple of times that our location was not optimal and we were able to move the Eeros to get them to the right spot for them to connect. Having that kind of analysis and help without having to experiment yourself really is a nice feature of the system set up.
I did a video walk through of this set up process if you want to see what each step looked like on my iPhone as I did it. You can view the video below:
Testing My New Eero Network
Once I had everything set up I went to the spot where I was having the most issues and did a speed test. Before my speeds would be half the speeds I would get at my Mac Mini connected directly to the router by ethernet. With the Eeros I was getting just about full speed, I say just about because ethernet still is the fasted speed you can get compared to wireless. I was excited. I noticed that the app would track which Eero I was connected to which was great to see how my devices would automatically switch to the strongest signal which would be the closest Eero.
My speeds were not any faster than before but they were fast in every spot in my home which is what I was after. Another benefit has been almost no drop off's or lags like I experienced with my previous set up. One of the biggest evidence of the change Eero had made came from my boys who do online gaming. They all stated they could tell the difference and they were excited about not having to worry about the bandwidth while playing their online games.
One of the advantages of getting a system like this is the blanketing of your network speeds across your home without having to worry about who is online when. This certainly has been my experience so far and I will continue to test but so far I am impressed.
Managing Your Network with the Eero App
The Eero application is where you do all the work to manage your network. At a glance you get a built in speed test that can be re-run at anytime just by dragging down on the home screen. It also shows each of your Eeros with the status of each. You are also greeted with the number of devices you have on your network and can drill into that list and see how each device is connected, the local IP address, MAC address and a space where you can give each device a nickname to make it easier to identify your network devices.
On the side is a menu that allows for setting up a guest network with a slider and a button that allows you to share the SSID and password with your guests via text or email making it easier to get people on your network without having to repeat your login credentials for each device your family wants to connect.
There is also a Profiles area that allows you to set up different profiles for the devices you want to manage on your network. This comes in handy if you have kids like I do and you can't seem to get them off their devices to get them to dinner or to leave for school. With profiles, I set one up for the kids for instance and add each of their devices to the profile. I then had the ability to turn off network access for all of those devices or set time limits for when access is allowed. This can be done on a device by device basis as well, but it is nice to have a group where you can shut everything down for them at once while still keeping your own access working.
Finally there is an advanced area where you can do most of the things you would need to do for things like running a macOS Server. There is a space for DHCP reservations (which I promptly set up for my server). These reservations are limited to one local range so the 10.0.1.3 that I use in my server tutorials won't work and needs to be changed. There is also a place to set up custom DNS which I also did for my server as the primary DNS entry and OpenDNS for the second one which adds the filtering I use across my network. For port forwarding you do this on a per device basis so I used my server and forwarded the necessary ports needed for my various server services. There is also built in Universal Plug and Play (UPnP) which you can enable or disable as well which allows devices like game consoles to automatically configure the access they need.
Overall most of the settings I am used to using on a frequent basis are present in the Eero app. I do miss the integration of my Apple Router with the macOS Server app where ports are opened automatically. Radius is also not available as it is with the AirPort Extreme Base Station but I wasn't using that myself anyway.
In using the app I stumbled across the fact that I could remotely change ports or configure my server without having to be on my local network. Now that was an advantage on one hand especially where I forgot to forward a needed port while on the road and was able to just open it. On the other hand, this does pose a security issue in that losing your device could potentially lead to someone having control of your network but they would have to have your password to get in. I hope that Eero does implement Touch ID on the app itself instead of just relying on the main login for protection.
To give you an idea of how to each setting looks and work I did another video walk through. You can view that video below:
Conclusion
So far I would say the Eero system has lived up to the hype for me. I was so impressed with my own experience and the simplicity of set up and managing the network that I installed one in my dad's home the follow week while we were visiting as he was having terrible wifi issues. As I experienced in my own home, Eero took care of his issues and he was getting more than double the speeds he had previously in his trouble spots in his home.
So is Eero for you? Or should look into another system? That all depends on your situation and the issues you may be experiencing with your own network set up. If you like to tweak every setting and have more control over your network and router then Eero is not for you. They are rolling out features but so far there are still features missing from other modern routers. If you don't fit that category however, I would seriously consider giving Eero a try!
MacOS Sierra Server Part 10: Bind Clients to the Server
As always thanks for watching! If find these tutorials helpful please like, favorite, and share them so others on the internet can find them.
MacOS Sierra Server Part 9: Users & Groups
As always thanks for watching! If find these tutorials helpful please like, favorite, and share them so others on the internet can find them.
MacOS Sierra Server Part 8: SSL Certificates
As always thanks for watching. If you find this tutorial helpful please like, favorite, and share it so others can find it on the internet. Feel free to leave a comment if you have any questions and I'll do my best to answer it.
MacOS Sierra Server Part 7: Open Directory
As always thanks for watching. If you find this tutorial helpful please like, favorite, and share it so others can find it on the internet. Feel free to leave a comment if you have any questions and I'll do my best to answer it.
MacOS Sierra Server Part 6: DNS
As always thanks for watching! Please be sure to subscribe, like, share, and favorite this screencast if you found it helpful so others can find it as well!
MacOS Sierra Server Part 5: Port Forwarding
As always thanks for all of your support! If you find this tutorial helpful please subscribe, like, favorite and share it so others can find it on the internet. If you have any questions or comments feel free to leave them below and I'll do my best to get back to you.
MacOS Sierra Server Part 4: Network Configuration
As always thanks for all of your support! If you find this tutorial helpful please subscribe, like, favorite and share it so others can find it on the internet. If you have any questions or comments feel free to leave them below and I'll do my best to get back to you.
MacOS Sierra Server Part 3: Server Install & Initial Set Up
As always thanks for your support. If you find this video helpful please subscribe, like, favorite, and share it so others on the internet can find it.
MacOS Sierra Server Part 2: Complete Server Uninstall
As always thanks for watching and for all of your support. If you find this video helpful please like, favorite and share it with others.
Also, subscribe to my channel as I will put weekly content out including some upcoming series on my favorite apps!
MacOS Sierra Part 3: Clean Install macOS

If you have any questions feel free to leave a comment below.
If you find these videos helpful please subscribe, like, favorite and share them so others can find them on the internet.
Thanks for all your support!
MacOS Sierra Part 2: Cloud & Document Sync

I did encounter some delays in uploading and had to restart my Mac several times to get the process to finish the original sync. So if you find it is not finishing with cloud icons next to your files and it saying it has to upload more files, then try a restart and see if that helps.
As always thanks for watching. If you have any comments or questions feel free to leave a comment below. Also please Like, favorite, share and subscribe so others can find this video on the internet.
Have a great week!
MacOS Server 5 Part 1: Server Upgrade
As always thanks for watching! If you find this video helpful please subscribe, like, favorite and share it so others can find it on the internet.
MacOS Sierra Part 1: Upgrade Walk Through

As always thanks for watching. Be sure to subscribe, like, favorite and share this view so others can find it on the internet.
Upgrading to iOS 10: A Step by Step Walkthrough
There has been some talk that doing an over the air upgrade could have some problems so you might want to plug it into your Mac to do the upgrade just in case. In my case over the air worked fine but thought I would report what I have heard.
If you find this video helpful please favorite, like and share it so others can find it on the internet.
Thanks as always for all your support! Happy upgrading!
Mac Productivity Part 3: iOS to Mac Printing with Printopia
https://www.decisivetactics.com/products/printopia/
As always thanks for watching and for all of your support. Please subscribe, like, share and favorite this video to help others find it on the internet.
If you have any questions or concerns feel free to leave them below or send me an email.
Mac Productivity Part 2: Yoink 3
As always thanks for watching! If you found this video helpful please like, favorite, share, and subscribe so others can find it on the internet.
Also if you need help setting up your own Mac or Mac Server feel free to email me at todd@toddolthoff.com.
Thanks as always for all your support!
iOS 10 Beta Part 2: Home, Clock & News Apps
As always thanks for all of your support. If you find the video helpful please like, favorite and share it with others so it can be found on the internet.
Also please be sure to subscribe to be notified of other upcoming videos!
If you have any questions or would like help with any of your Mac needs feel free to leave a comment below or shoot me an email at todd@toddolthoff.com.
Thanks for watching!
iOS 10 Beta Part 1: Installation & Set Up
As always thanks for watching and for all of your support. If you find this video helpful please like, favorite and share it so others can find it on the internet.
PLEX Part 8: PLEX Pass-Home & Parental Controls
In this screencast I walk you through how to set up managed accounts, parental controls and how to enable guest access for when you have friends or family over.
If you have any questions feel free to leave them below and I’ll do my best to respond and answer any questions you may have.
PLEX Part 7: PLEX Pass-Sync Features
As always thanks for watching. If you find this video helpful please like, favorite and share it so others can find it on the internet.
If you have any questions feel free to leave them below and I’ll do my best to get back to you. Thanks for all you support!
PLEX Part 6: PLEX Pass-Music Features
This week I start by looking at the more advanced music features included with a PLEX Pass including Audio fingerprinting, lyrics, plex mix, mood mix and mobile sync and cloud sync (which I will cover in more depth in a future screencast).
As always thanks for watching. I you find this video helpful please like, favorite and share so others on the internet can find it.
PLEX Part 5: Accessing Your Media Remotely
Thanks so much for watching. As always if you have any questions feel free to leave them below.
Please be sure to like, favorite and share this video so others can find it on the internet.
Thanks again for all your support!
PLEX Part 4: Sharing Features
As always thanks for watching. If you this video helpful please like, share and favorite it so others on the internet can find it. If you have any questions feel free to leave them below.
PLEX Part 3: Working with Metadata
In the next screencast I will look at the various settings available in the PLEX interface including how to set your PLEX Media Server to be accessible anywhere.
As always thanks for watching. If you find this video helpful please like, favorite and share it with others so others can find it on the internet.
PLEX Part 2: Adding Your Media
In my next screencast I’ll cover how to work with metadata inside PLEX in case all of your media was not matched.
As always, thanks for watching. If you found this video helpful please like, favorite and share it so others will find it on the internet.
PLEX Part 1: Media Prep & Install
In this screencast I show you how to prepare your media to be accessed by PLEX so that it can accurately read the file names and then apply the right metadata. I also walk you through the initial sign up and install of the PLEX Media Server which needs to run on your Mac for all of your media to accessible through all of the PLEX apps. This will the first in an in depth series on PLEX where I plan to cover all of the features and walk you through how to get started.
If you have any questions or comments feel free to leave them her on my blog or on my YouTube Channel.
OS X Server: Dynamic DNS Set Up
For those who are home users who don't have a business tier, their public ip is leased to them for a period of time. Then when something happens like a reboot of the modem or a random update at their ISP, their public ip changes and then they are stuck unable to access their server until the are able to get home, figure out what the new public ip is and then make the change at their domain provider to get everything up and running again. This leads to being locked out of the server and causes problems.


If you need any help with your own set up feel free to email me. I do server consulting and would love to help!
El Capitan Server Part 36: Xcode
If you would like me to consult with you in setting up your server I can do that remotely. Just email me at todd@toddolthoff.com.
If you find this tutorial helpful please subscribe, like, favorite and share it so others can find it on the internet. If you have any questions or comments feel free to leave them below and I'll do my best to get back to you.
El Capitan Server Part 35: NetInstall
If you would like me to consult with you in setting up your server I can do that remotely. Just email me at todd@toddolthoff.com.
If you find this tutorial helpful please subscribe, like, favorite and share it so others can find it on the internet. If you have any questions or comments feel free to leave them below and I'll do my best to get back to you.
El Capitan Server Part 34: DHCP
If you would like me to consult with you in setting up your server I can do that remotely. Just email me at todd@toddolthoff.com.
If you find this tutorial helpful please subscribe, like, favorite and share it so others can find it on the internet. If you have any questions or comments feel free to leave them below and I'll do my best to get back to you.
El Capitan Server Part 33: Wiki
As always thanks for watching! If you have any questions or comments feel free to leave them below and I’ll do my best to get back to you.
If you would like me to consult with you in setting up your server I can do that remotely. Just email me at todd@toddolthoff.com.
If you found this screencast helpful please like, favorite and share it so others can find it on the internet. Thanks so much for all of your support
El Capitan Server Part 32: FTP

As always thanks for watching! If you have any questions or comments feel free to leave them below and I’ll do my best to get back to you.
If you would like me to consult with you in setting up your server I can do that remotely. Just email me at todd@toddolthoff.com.
If you found this screencast helpful please like, favorite and share it so others can find it on the internet. Thanks so much for all of your support
El Capitan Server Part 31: Profile Manager Devices
As always thanks for watching! If you have any questions or comments feel free to leave them below and I’ll do my best to get back to you.
If you would like me to consult with you in setting up your server I can do that remotely. Just email me at todd@toddolthoff.com.
If you found this screencast helpful please like, favorite and share it so others can find it on the internet. Thanks so much for all of your support
El Capitan Server Part 30: Profile Manager Users & Groups
As always thanks for watching! If you have any questions or comments feel free to leave them below and I’ll do my best to get back to you.
If you would like me to consult with you in setting up your server I can do that remotely. Just email me at todd@toddolthoff.com.
If you found this screencast helpful please like, favorite and share it so others can find it on the internet. Thanks so much for all of your support
El Capitan Server Part 29: Profile Manager Overview
As always thanks for watching! If you have any questions or comments feel free to leave them below and I’ll do my best to get back to you.
If you would like me to consult with you in setting up your server I can do that remotely. Just email me at todd@toddolthoff.com.
If you found this screencast helpful please like, favorite and share it so others can find it on the internet. Thanks so much for all of your support
El Capitan Server Part 28: Profile Manager iOS Enrollment
I cover how to install the certificates including the order of installation and what you can do with your iOS Device from the my devices portal.
As always thanks for watching! If you have any questions or comments feel free to leave them below and I’ll do my best to get back to you.
If you would like personal help in setting up your server, feel free to contact me at todd@toddolthoff.com.
If you find these tutorials helpful please like, favorite and/or share them so others can find them.
El Capitan Server Part 27: Profile Manager Mac Enrollment
In this screencast I cover how to install the certificates including the order of installation and what you can do with your Mac from the my devices portal.
As always thanks for watching! If you have any questions or comments feel free to leave them below and I’ll do my best to get back to you.
If you would like personal help in setting up your server, feel free to contact me at todd@toddolthoff.com.
If you find these tutorials helpful please like, favorite and/or share them so others can find them.
El Capitan Server Part 26: Profile Manager Set Up
As always thanks for watching. If you found this video helpful please like, favorite and share it with others.
If you have any questions feel free to leave them below.
El Capitan Server Part 25: Websites
As always thanks for watching! If you have any questions or comments feel free to leave them below and I’ll do my best to get back to you.
If you would like me to consult with you in setting up your server I can do that remotely. Just email me at todd@toddolthoff.com.
If you found this screencast helpful please like, favorite and share it so others can find it on the internet. Thanks so much for all of your support
El Capitan Server Part 24: Mail
If you find this tutorial helpful please subscribe, like, favorite and share it so others can find it on the internet. If you have any questions or comments feel free to leave them below and I'll do my best to get back to you.
Thanks for watching!
El Capitan Server Part 23: Messages
As always, thanks for watching! If you enjoyed the tutorial please like, favorite and share its others can find it.
El Capitan Server Part 22: Calendars
As always thanks for watching. If you have any questions feel free to leave them below.
If you found this screencast helpful, please like, favorite and share it so others can find it on the internet. Thanks for all your support
El Capitan Server Part 21: Contacts
As always thanks for your support. If you have any questions feel free to leave them below and I'll do my best to answer your questions.
If you find this tutorial helpful, please like, favorite or share this tutorials so others on the internet can find it. Thanks for all your support
El Capitan Server Part 20: Caching Server
If you find this tutorial helpful please like, favorite and share it so others can find it on the internet. If you have any questions or comments feel free to leave them below and I'll do my best to get back to you.
Thanks for watching!
El Capitan Server Part 19: Software Update
As you are deciding how to implement updates you may also want to take a look at the screencast I will be doing next week on the Caching Service as there is overlap between these two services and you may find that the Caching Service may be a better fit in meeting your needs for storing updates on your server. I will cover the pros and cons of each in the next screencast.
If you have any questions or comments feel free to leave a comment here or on my Youtube Channel.
El Capitan Server Part 18: VPN
VPN stands for Virtual Private Network and it basically logs you into your home server and then encrypts you communications and routes them through your home network. This keeps hackers from being able to read what you are sending back and forth over the internet. Another benefit of using a VPN is the ability to connect to your home server remotely without the need of purchasing a host name. The beauty of using OS X Server instead of paying for a VPN service is that it only costs $19.99 with no other fees.
In the screencast I cover how to set up the VPN service in OS X Server. I also cover how to set up your devices to use the service.
If you have any questions or comments feel free to leave them below or on my Youtube Channel and I'll do my best to get back to you.
El Capitan Server Part 17: Time Machine
In this screencast I cover how to set up the Time Machine Service. I also cover how to connect your users to the back up, set a limit on the size of each back up, and how to monitor your back ups to make sure they are working properly. As always, feel free to leave a comment here or on my Youtube Channel.
El Capitan Server Part 16: Connect to File Shares-iOS
As always thanks for watching! If you have any questions or comments feel free to leave them below or on my Youtube Channel.
El Capitan Server Part 15: Connect to File Shares-Mac
As always thanks for watching! If you have any questions feel free to leave them below or on my Youtube Channel.
Fixing OS X Webdav Connection Issue OS X Server 5
If you have any questions feel free to leave a comment here or on my Youtube Channel. If you find other fixes for issues you may be having with Server and would like to share them, please leave a comment here or email me.
Talking PLEX on Mac Power Users
It was a lot of fun talking with my friends David Sparks (http://macsparky.com) and Katie Floyd (http://katiefloyd.com) about how PLEX works and some ways each of us uses PLEX. If you have never tuned into Mac Power Users I would highly recommend giving it a shot and listening in every week. David and Katie have a great way of talking tech in a practical way that also gives some great tips on ways to get the most out of your technology.
You can listen to the show on PLEX HERE.
You can subscribe to Mac Power Users HERE.
If you have any questions on PLEX feel free to leave a comment below. You can also view my series of tutorials on PLEX on my Youtube Channel. I am in the process of doing an update to the screencasts I did back in 2013.
El Capitan Server Part 14: File Permissions
In this screencast tutorial I cover how to work with file permissions in OS X Server. I walk through defining POSIX and ACL permissions and how they work. I then go through each of the permissions available to set in the OS X Server interface and some basic best practices for setting up your permissions.
As always thanks for watching. If you have any questions feel free to leave them below and I'll do my best to answer them.
El Capitan Server Part 13: File Sharing
As always thanks for watching. If you have any questions feel free to leave them below and I'll do my best to answer them.
El Capitan Server Part 12: Bind Clients to the Server
In this screencast tutorial I cover how to bind a Mac to your server. I walk through the settings you need to make sure are in place on your server to allow for an authenticated bind. Then I walk through the actual binding process and show what to put in each field to make the bind work.
As always thanks for watching! If you have any questions or comments feel free to leave them below or on my Youtube Channel.
El Capitan Server Part 11: Users & Groups
As always thanks for watching! If you have any questions feel free to leave them here or on my Youtube Channel.
El Capitan Server Part 10: Open Directory
In this screencast tutorial I cover how to set up an Open Directory for your OS X Server. I cover why you might want to set up an Open Directory, how to set up an OD for the first time, how to back up your OD, and the difference between network and local accounts.
As always thanks for watching. If you find this tutorial helpful please like, favorite, and share it so others can find it on the internet. Feel free to leave a comment if you have any questions and I'll do my best to answer it.
El Capitan Server Part 9: SSL Certificates
As always thanks for watching. If you find this tutorial helpful please like, favorite, and share it so others can find it on the internet. Feel free to leave a comment if you have any questions and I'll do my best to answer it.
El Capitan Server Part 8: DNS
As always thanks for all of your support! If you find this tutorial helpful please subscribe, like, favorite and share it so others can find it on the internet. If you have any questions or comments feel free to leave them below and I'll do my best to get back to you.
El Capitan Server Part 7: Port Forwarding
As always thanks for all of your support! If you find this tutorial helpful please subscribe, like, favorite and share it so others can find it on the internet. If you have any questions or comments feel free to leave them below and I'll do my best to get back to you.
El Capitan Server Part 6: Network Configuration
As always thanks for all of your support! If you find this tutorial helpful please subscribe, like, favorite and share it so others can find it on the internet. If you have any questions or comments feel free to leave them below and I'll do my best to get back to you.
El Capitan Server Part 5: Install & Set Up
As always thanks for your support. If you have any questions or comments feel free to leave them below or on my Youtube Channel.
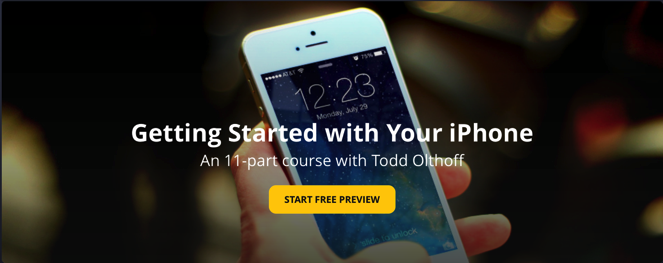
Getting Started with iPhone Series
Thanks again so much for watching! I am very thankful to be a part of an incredible community!
El Capitan Server Part 4: Complete Server Uninstall
Thanks so much for all of your support. If you have any questions or comments feel free to leave them below.
If you find this screencast helpful, please like, favorite, or share it so others can find it on the internet.
El Capitan Server Part 3: Clean Install OS X
As always thanks for watching. If you have any questions or comments feel free to leave them below. If you find the video helpful please like, favorite and share it so others on the internet can find it. Thanks!
El Capitan Server Part 2: Server Upgrade
If you already have your server up and running as you like it and your server is mission critical then I would either wait to upgrade to see what issues might come up or make sure you follow the steps in my Preparing for the Upgrade to Server 5.0 screencast.
As always thanks for watching and for all of your support! If you find this video helpful please like, favorite, and share it so others on the internet can find it.
If you have any questions or would like to inquire about having me consult on setting up your own server please feel free to leave a comment.
El Capitan Server Part 1: Preparing to Upgrade
In this screencast I cover your back up strategy including taking a look at time machine, a bootable clone using Cronosync, archiving your Open Directory and using Bender to back up all of your server files.
As always thanks for watching! If you have any questions or comments feel free to leave them below. Also if you find this screencast helpful, please like, favorite and share it so others on the internet will find it.
Thanks for all your encouragement and support!
iOS 9 Update Step by Step Walkthrough
As always thanks for watching. If you have any questions or need help, feel free to leave a comment and I’ll do my best to get back to you.
Two Xbox One's In One House: How to Online Game as a Family

So we started our journey to figure out if this could be done. It should be pretty simple I thought. I went online to see if I could find the answer and I got a lot of confusion and nothing really clarified it for me. So in my own experimenting with this subject I thought I would put an article out there to hopefully help others in our situation not have to go through the frustration we did to find an answer. Before I get into the specifics, however, let me clarify the problem I'm trying to solve.
Xbox Live Family Sharing
Multiple Players Switching Between Two Xbox One's
In the case of our family there are 4 of us who play the two Xbox One's we have in two common areas of the house. Depending on what is happening that day, we never know who will be playing on what box and no one wants to be tied to one room or the other. In that case, there is no easy solution and it is more costly. We found that each box needs to have an Xbox Live account so that everyone can change between boxes whenever they want. This then becomes no different than what you could do before with adding two Xbox's to the home with the exception that you don't need one for every player in the house. If you want to play digital content, you still have to have the family member login to the home Xbox of the one who purchased the content and you go to the other Xbox to play which is still inconvenient. We just decided to buy two disk versions of the game to play seamlessly and at least we can sell them back in the future once we get tired of playing them.
So there really is no easy way to have two Xbox One consoles in your home and play back and forth with one game seamlessly. With all of the hoops we had to jump through it would have almost been easier to say get two complete set ups and go from there. It sure would have saved a lot of time and effort to get done what we set out to do in the first place. Hopefully this will help some of you out there trying to do the same thing.
iOS 9 Upgrade Part 2: Clean Install
As always if you have any questions or comments, feel free to leave them below or on my Youtube Channel. I hope you enjoy the video and your new iPhone of course!
iOS 9 Upgrade Part 1: Backing Up with Phoneview
In this screencast I give you an overview of Phoneview and cover it's features in detail. I would highly recommend using a product like this just to make sure all of your important communications are backed up and accessible outside of your phone. If you have any questions or comments, feel free to leave them below or on my Youtube Channel.
OS X El Capitan Beta Part 4: Maps & Notes

If you find this tutorial helpful please subscribe, like, favorite and share it so others can find it on the internet. If you have any questions or comments feel free to leave them below and I'll do my best to get back to you.
OS X El Capitan Beta Part 3: Safari & Mail
In this screencast I walk through all of the changes in the current beta to give you and idea of how they work. Because this is beta software these updates could change or more features may be added before the final release. If you have any questions or comments feel free to leave them below or on my Youtube Channel.
OS X El Capitan Beta Part 2: New System Features
If you find this tutorial helpful please subscribe, like, favorite and share it so others can find it on the internet. If you have any questions or comments feel free to leave them below and I'll do my best to get back to you.
OS X El Capitan Beta Part 1: Dual Boot Installation
If you find this tutorial helpful please subscribe, like, favorite and share it so others can find it on the internet. If you have any questions or comments feel free to leave them below and I'll do my best to get back to you.
OS X Server Part 35: Mobile Accounts
If you would like me to consult with you in setting up your server I can do that remotely. Just email me at todd@toddolthoff.com.
If you find this tutorial helpful please subscribe, like, favorite and share it so others can find it on the internet. If you have any questions or comments feel free to leave them below and I'll do my best to get back to you.
OS X Server Part 34: Xcode
If you would like me to consult with you in setting up your server I can do that remotely. Just email me at todd@toddolthoff.com.
If you find this tutorial helpful please subscribe, like, favorite and share it so others can find it on the internet. If you have any questions or comments feel free to leave them below and I'll do my best to get back to you.
OS X Server Part 33: NetInstall
If you would like me to consult with you in setting up your server I can do that remotely. Just email me at todd@toddolthoff.com.
If you find this tutorial helpful please subscribe, like, favorite and share it so others can find it on the internet. If you have any questions or comments feel free to leave them below and I'll do my best to get back to you.
OS X Server Part 32: DHCP
If you would like me to consult with you in setting up your server I can do that remotely. Just email me at todd@toddolthoff.com.
If you find this tutorial helpful please subscribe, like, favorite and share it so others can find it on the internet. If you have any questions or comments feel free to leave them below and I'll do my best to get back to you.
OS X Server Part 31: FTP
As always thanks for watching! If you have any questions or comments feel free to leave them below and I’ll do my best to get back to you.
If you would like me to consult with you in setting up your server I can do that remotely. Just email me at todd@toddolthoff.com.
OS X Server Part 30: Wiki
In this screencast I walk through the wiki service and show how to set it up and some of the basic services available. I also walk through some of the customization options to show you the possibilities in making the wiki work for you. If you have any questions or comments feel free to leave a comment below and I'll get back to you.
OS X Server Part 29: Websites
In this screencast I cover how to set up your own website. I cover the built in site and how the settings function. Then I walk you through how to set up your own custom site including the DNS you need to make it work. If you have any questions or want help setting up your own website feel free to leave a comment and I'll get back to you.
OS X Server Part 28: Profile Manager Devices
In this screencast I cover how to manage your devices through the Profile Manager web interface. I cover all of the settings unique to devices and what each of those settings will do on your Mac or iOS devices. I also cover how to set up device groups so you can manage groups of devices at one time instead of managing one device at a time. If you have any questions, feel free to leave a comment and I'll get back to you.
OS X Server Part 27: Profile Manager Users & Groups
For those of you who manage a lot of users, this set up really makes managing those users a breeze. This works well for those managing schools or the workplace where you have different settings for different users or groups of users. It also works well at home for managing kids and making changes once which then take place for all of your kids.
In this screencast I walk through each of the settings for users and groups in Profile Manager. I give you an overview of all of the settings you can make and give some ideas of when you might want to use those settings. If you have any questions or want help setting up your own server, leave a comment below and I'll get back to you.
OS X Server Part 26: Profile Manager Overview
In this screencast I walk through the web interface for Profile Manager. I cover all of the main sections and what each area covers. In future screencasts I will walk through each of the settings you can customize for users & groups and also for devices & device groups. If you have any questions or would like help in setting up your own server, feel free to leave a comment and I'll get back to you.
OS X Server Part 25: Profile Manager iOS Enrollment
In this screencast I will show you how to enroll your iOS devices including adding all of the certificates you need to manage your device remotely. If you have any questions or comments feel free to leave them here or on my Youtube Channel.
OS X Server Part 24: Profile Manager Mac Enrollment
As always thanks for watching! If you have any questions or comments feel free to leave them below and I’ll do my best to get back to you.
OS X Server Part 23: Profile Manager Set Up
In this screencast I show you how to set up Profile Manager so it is ready to use to create profiles to manage your devices and users. If you have any questions feel free to leave them below.
OS X Server Part 22: Mail
If you don't have any of those issues you can give it a try but I would still caution you that running your own mail server can be difficult. I personally leave it to others to run but in case you want to do it, I put together this screencast to help you. If you have any questions, feel free to leave a comment.
OS X Photos App Set Up
I decided it might help to do a walk through of the set up process to show you what it looks like to do the transfer from Aperture to the Photos App. I have found that seeing how it works can sometimes ease our own concerns about it so the screencast below is a walk through of the set up process. I will probably do other screencasts on the interface going forward so stay tuned. So far I have found the photos app to be helpful for your personal photos especially if you choose to use the iCloud Photo Library option. If you have a large library, be prepared to pay for more storage though. I hope you enjoy the video. Let me know if you have any questions or comments.
OS X Server Part 21: Messages
This is obviously more important to business or to home users who want to protect and monitor their kids communications and still give them access to a messaging service. Because you can limit who you users can connect to, you can see the benefit of hosting your own messaging server.
In this screencast I cover how to set up the messages service built into OS X Server. I also cover an issue with the current build of the messages service and how to fix it to hopefully get everything working the way you want.
f you have any questions or comments feel free to leave them below or on my Youtube Channel and I'll do my best to get back to you.
Thanks for watching!
OS X Yosemite Part 20: VPN
VPN stands for Virtual Private Network and it basically logs you into your home server and then encrypts you communications and routes them through your home network. This keeps hackers from being able to read what you are sending back and forth over the internet. Another benefit of using a VPN is the ability to connect to your home server remotely without the need of purchasing a host name. The beauty of using OS X Server instead of paying for a VPN service is that it only costs $19.99 with no other fees.
In the screencast I cover how to set up the VPN service in OS X Server. I also cover how to set up your devices to use the service.
If you have any questions or comments feel free to leave them below or on my Youtube Channel and I'll do my best to get back to you.
Thanks for watching!
OS X Yosemite Part 19: Contacts
OS X Server includes a contacts service that allows your host your own CardDAV server and even has the ability to push changes to all your devices and includes a directory contacts list. In this screencast tutorial I cover how to set up the contacts service in OS X Server. I go over each of the settings and show how they work on your client devices.
If you have any questions or comments feel free to leave them below or on my Youtube Channel and I'll do my best to get back to you.
Thanks for watching!
OS X Yosemite Server Part 18: Complete Server Uninstall
In this screencast I cover how to do a complete uninstall of Server. I cover all of the hidden files you need to look for in order to make sure you haven't left anything behind.
If you have any questions or comments feel free to leave them below or on my Youtube Channel and I'll do my best to get back to you.
Thanks for watching!
OS X Yosemite Server Part 17: Calendars
OS X Server includes a calendar service that allows your host your own CalDAV server and even has the ability to push changes to all your devices, send invitations, and even set up locations and devices that people could reserve for any of there appointments. In this screencast tutorial I cover how to set up the calendar service in OS X Server. I go over each of the settings and show how they work on your client devices.
If you have any questions or comments feel free to leave them below or on my Youtube Channel and I'll do my best to get back to you.
Thanks for watching!
OS X Yosemite Server Part 16: Caching Server
If you have any questions or comments feel free to leave them below or on my Youtube Channel and I'll do my best to get back to you.
Thanks for watching!
OS X Yosemite Server Part 15: Software Update
If you have any questions or comments feel free to leave a comment here or on my Youtube Channel.
OS X Yosemite Server Part 14: Server Back Up
There are many different options available to backing up your server. Every back up strategy should include, a back up of all of your server settings, an incremental back up, and a clone of your server. These back ups will give you options when it comes to restoring from some kind of failure.
In this screencast I cover how to back up your server. I go over each of the areas I mention above including the software and tools you can use to make those back ups. If you have any questions or comments feel free to leave a comment here or on my Youtube Channel.
OS X Yosemite Server Part 13: Time Machine
In this screencast I cover how to set up the Time Machine Service. I also cover how to connect your users to the back up, set a limit on the size of each back up, and how to monitor your back ups to make sure they are working properly. As always, feel free to leave a comment here or on my Youtube Channel.
OS X Yosemite Server Part 12: Connecting to Your File Shares
In this screencast I cover how t connect to your AFP shares using a couple different methods. I also cover how to set up your shares to auto mount to your Mac at start up. As always, if you have any questions feel free to leaver them here or on my Youtube Channel.
OS X Yosemite Server Part 11: File Sharing
If you have any questions feel free to leave a comment here or on my Youtube Channel.
OS X Yosemite Server Part 10: Bind Clients to Server
In this screencast, I cover how to bind your Mac clients to your server’s Open Directory. I walk through the steps needed to perform the bind and talk about the difference between authenticated and anonymous binding. If you have any questions feel free to leave a comment below or on my Youtube Channel.
OS X Yosemite Server Part 9: Users & Groups
In this screencast I cover how to set up your users, how to tell the difference between a network and local user and the advantages of each, and finally how to set up groups and manage your users in those groups. If you have any questions or comments, feel free to leave them here or on my Youtube Channel.
OS X Yosemite Server Part 8: Open Directory
In this screencast tutorial I cover how to set up an Open Directory for your OS X Server. I cover why you might want to set up an Open Directory, how to set up an OD for the first time, how to back up your OD, and the difference between network and local accounts. If you have any questions or comments, feel free to leave them here or on my Youtube Channel.
OS X Yosemite Server Part 7: SSL Certificates
SSL verifies that you are who you say your are or that the server you are trying to contact is the server you think it is so you don’t end up connecting to a spoofed site that then steals your information. There are two types of SSL Certificates in terms of verifying identity. There is a self signed certificate where the user is vouching for him/herself and a verified certificate where a third party is verifying the identity of the service you are looking to connect with. Obviously the verified SSL Certificate is more trusted than a self signed one. If you try to connect to a site that has signed it’s own certificate you will get a warning that that is the case while a verified certificate will go through without a warning since it is trusted. For your own website you really don’t need a verified SSL Certificate because you know who you are. If you are hosting a site that third parties will visit, you will want to have a purchased one.
In this screencast tutorial I cover the Certificates Service built into OS X Server. I cover what SSL certificates do, the differences between self-signed & verified certificates, how to secure your services with SSL, the different types of certificates you can create in OS X Server, and how to purchase and set up a third party verified SSL certificate. If you have any questions or comments, feel free to leave them here or on my Youtube Channel.
OS X Yosemite Server Part 6: DNS
In OS X Server everything hinges on properly set up DNS. If you have a problem with your DNS then most of your services will not function properly and you will have all kinds of issues. If your DNS is not set up properly and you set up and Open Directory based on that DNS you will most likely have to start over with your Open Directory once you get your DNS set up properly, so you will want to make sure you have it working before you set up the rest of your server’s services.
In this screencast I cover how to set up the DNS service in OS X Server 4. I cover how DNS works, what each of the DNS records do, walk through two ways to set up your DNS, and cover how to test your DNS to make sure it is working properly. If you have any questions or comments, feel free to leave them here or on my Youtube Channel.
OS X Yosemite Server Part 5: Host Name and Server Settings
If you have any questions or comments, feel free to leave them here or on my Youtube Channel.
OS X Yosemite Server Part 4: Port Forwarding
When you forward a port you are creating the door for the service to go through as long as the user of that service knows he username and password needed to go through the door. This verification serves as the key to that door and let’s authorized users to have access to that service through that port. In OS X Server, if you have an Airport Extreme Base Station or AEBS, the server software itself handles opening and closing ports. If you have a third party router you will have to look up how your router handles port forwarding and you will need to set it up manually.
In this screencast I cover how to set up port forwarding using an AEBS with OS X Server. I cover the basics of port forwarding and how it works on your network. I also cover how to set up and use port forwarding with the built in service with OS X Server and how to do it manually if you don’t have an Apple Router. If you have any questions or comments, feel free to leave them here or on my Youtube Channel.
OS X Yosemite Server Part 3: Network Configuration
Another thing you will need to do make sure your server is functioning properly is to set up a DHCP Reservation for your server. A DHCP Reservation is giving your server a permanent internal IP address so every time your server is online it will have the same IP address. This is needed because your other devices that will be connecting to your server will be looking to it for DNS and other services and if the IP address changes those devices will not be able to know what the new IP is for your server.
In this screencast I cover router considerations and how to do a basic set up of your network to make sure it is ready to work with OS X Server. If you have any questions or comments, feel free to leave them here or on my Youtube Channel.
OS X Yosemite Server Part 2: Install & Set Up
Overall the new update is a good one and Apple has done some things to polish up the server app. It does have a new look to match the changes made to the visual design found in Yosemite. It also has some little touches like the Access tab and the reachability service that make the process of determining how things are configured and if they can be reached outside your server much easier. So most of the changes are little touches here and there but you can see how Apple is slowly refining the Server app to make it more accessible.
OS X Yosemite Part 4: Clean Install Walkthrough
In this screencast I walk your through how to do a clean install of OS X Yosemite. I cover how to do the install from a USB Boot Installer (this is something I covered in the previous screencast which you can view on my blog HERE) and show you screen by screen what the install looks like. One of the changes I noticed right away is the installer only runs once and then reboots right into the set up process saving time. In Mavericks the installer would run through the install screen twice and then go right into the set up and seemed to take more time to run than Yosemite does.
If you have any questions or comments, feel free to leave them below or on my Youtube Channel.
OS X Yosemite Part 3: Creating a USB Installer
While this process is convenient it can take some time as you still have to download the installer package as a part of the installation process. Depending on your bandwidth and how many machines you need to do a clean install of, it could add to the time it takes to get the job done.
With a bootable USB installer, you can download OS X once, create the installer and then use that USB drive to boot each of your machines into the OS X installer. OS X is only downloaded once to create the installer and you can take that USB drive with you from machine to machine. It really can make the installation process fast and convenient.
In this screencast, I cover two ways to create a USB Installer, one using Diskmaker X and the other using the terminal process for ‘createinstallmedia.’ Both of these options create a bootable installer that you can use to do a clean install of OS X. If you have any questions or comments, feel free to leave them below or on my Youtube Channel.
OS X Yosemite Part 2: Handoff on All Your Macs
But like any new set of features there is a cutoff on what devices can use the features. Handoff needs bluetooth 4.0 to function so any device that doesn’t have that version of bluetooth is left out. Also, Apple chose to leave out some of it’s older Macs that do have bluetooth 4.0 like the mid 2011 Mac Mini that I use for my server. This is frustrating because my Mac Mini has everything it needs to make Handoff work. So I went on a search to see if I could work around that requirement and found a tool that enables continuity on older Macs, even those that don’t currently have bluetooth 4.0 but could add it with a card or USB device.
The Continuity Activation Tool was created by a group over on Github and you can read more about it HERE. The tool basically changes Apple’s system check and changes the no to using continuity to a yes. It is a simple to use tool and very easy to run. Just download the zip and run the tool. On their Github page, they let you know what Macs it works on and what is needed to make it run on each Mac.
In this screencast I walk through using the tool to enable handoff. I also cover how to use handoff on your Mac and show how each function works. As always thanks for watching! If you have any questions feel free to leave them here or on my Youtube Channel.
OS X Yosmite Server Part 1: Server Upgrade
In this screencast I walk you through the upgrade and give you a basic tour of some of the more obvious changes to OS X Server. I will walk through each of the services like I normally do to help you to get your server configured the way you want it.
If you have any questions, feel free to leave a comment below or on my Youtube Channel.
OS X Yosemite Part 1: Upgrade Step by Step
Overall, I found the upgrade process to go smoothly. I did experience that the time was off by about 20 minutes each time overall and the when it says less than a minute left it means more like 5 minutes or so. But using the new operating system has been smooth and I haven’t experienced any major bugs with this release like I did with Mavericks.
If you have any questions or issues feel free to share them below or on my Youtube Channel.
iOS 8 Tips & Set Up: Health Kit
One app I have been trying out lately on the health side is Motion X 24/7. This application tracks your sleep patterns, steps, pulse, and other medical data. What I like about the app is that it can track your sleep patterns without the need for a separate bracelet. Just leave the phone on the bed next to you or on your pillow and it gives a detailed analysis of your sleep patterns including recording moments when it hears noise to see if you are snoring. This app integrates nicely with Health Kit as you will see in the tutorial below.
In this screencast tutorial I walk through the new Health Kit feature that is built into iOS 8. I walk through how to set up a Medical ID for emergency situations, how to enter your health data, how to give other health applications access to health kit so they can share your health data, how to track that data on a personalized dashboard, and how to export your data so your doctor can review it.
As always thanks for all of your support! If you find this tutorial helpful please subscribe, like, favorite and share it so others can find it on the internet. If you have any questions or comments feel free to leave them below or on my Youtube Channel and I'll do my best to get back to you.
iOS 8 Tips & Set Up: 1Password & Sharing Service
Well with iOS 8 Apple introduced a new sharing service that allows developers to add services to the sharing menus so they can communicate across applications. One of the applications that really needed this ability was 1Password. 1Password is an application that stores all of your passwords and other confidential information in a secure file that can only be unlocked with your one password that you set up. 1Password solves the problem of remembering all of your passwords or using the same password everywhere so you can remember it which is very insecure, by allow you to only have to remember the one password it takes to open your password vault and then automatically filling in your passwords for you. It is one of the applications I install first on all of my Macs and now with the new updates to iOS 8 will be the first one I install on iOS devices as well.
1Password has an extension that allows you to click a button, type in your one password and it will pre fill all of your login information for you for whatever site you are on. Prior to iOS 8, you had to access 1Password and used its built in web browser to get the same functionality you got on your Mac with Safari. It was a work around and a pain in that you could be in Safari on your iPad and then go to a site with a password and then have to go to one password and use it’s browser to log in (or you could copy the password from 1Password and then go back to Safari and paste it in). This made it difficult to use all of the power and convenience of 1Password on iOS. Now with the new sharing feature, you can use Safari in iOS and click the share button, 1Password, and then type your 1Password and have it fill in your login information for you. Just like it works on the Mac! Also, if you have Touch ID you don’t even have to use your password as you can use your finger print to login!
In this screencast I walk you through how to set up and use 1Password on iOS 8, I also cover some of the built in features of the sharing service and show how that might work with other applications. If you have any questions or comments, feel free to leave them here or on my Youtube Channel.
iOS 8 Tips & Set Up: Family Sharing
Family Sharing allows you to link up to 5 iCloud accounts together in what is called a Family. This family allows each user to have his/her own iCloud accounts but links them together into a family where they have a shared family calendar, a shared family photo share, shared iTunes account to allow for shared apps, and certain restrictions that allows the primary account holder to approve an iTunes purchase and allows for the set up of accounts for children under the age of 13.
In this screencast I cover how to set up family sharing. I also cover all of the settings and walk you through all of the options and each step along the way in setting up your own personal family share. Be aware that you can only set up two family shares a year so if you make a mistake and delete a family, you can only add one more. If you added someone by mistake it is better to delete that person and keep the family share instead of deleting the family completely. Also be aware that children under the age of 13 that are added cannot be deleted and only transferred to another family share.
If you have any questions, feel free to leave a comment here or on my Youtube Channel.
Upgrading to iOS 8: A Step by Step Walkthrough
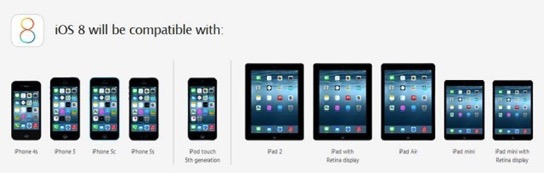
Once you know your device is eligible, you will want to make sure you have a back up of your iOS device just in case something goes wrong with the update. You can either create a back up over the air and storing it on iCloud or by connecting your device to iTunes and storing the back up on your Mac or PC. I cover how to do this in the tutorial below.
Once you have your backup all set, you can start the update by going to Settings-General-Software Update. It may take a while to download the update and you need to make sure you have at least 5.7 GB of space on your device. If you do not, I cover how to make space for the update in the screencast below.
I found the update to take a couple of hours because I did it on launch day. You will probably be able to do so in much less time. Once you have updated your device you won’t notice much of a change on the surface but there are many innovations and improvements that will make iOS 8 a joy to work with. I’ll probably do a future screencast that goes over some of these changes.
If you have any questions, feel free to leave a comment here or on my Youtube Channel and I’ll do my best to get back to you.
Mavericks Server Part 40: Accessing Your Server Remotely

In this screencast I cover how to connect to your server using screen sharing, the server application, and other options. As always if you have any questions feel free to leave a comment here or on my Youtube Channel.
Mavericks Server Part 39: Documents 5-Working with File Shares on iOS
Documents 5 gives you the convenience and familiarity of the Finder on your iOS devices. Documents 5 will connect to your afp or smb file shares and display those files in the same folder hierarchy that you have set up on your server. From there you can open and share those files and folders with your other iOS apps. In this screencast I cover how to connect to your file shares and navigate them in Documents 5.
If you have any questions or comments feel free to leave them here or on my Youtube Channel.
Mavericks Server Part 38: Airport Adminstration
Using the service in OS X Server with an AEBS, Server automatically enters the ports you need for the services you entered. It will also open those ports without the need to restart your router so no one loses internet service and turning services on and off becomes seamless. It really is a great feature of OS X Server and is another reason to consider using an Apple router.
Not only does OS X Server control the opening and closing of ports, it also has a built in RADIUS service. RADIUS stands for Remote Authentication Dial In User Service. This basically means that instead of having your users log onto your wireless network with a general SSID and general password, they log in with their Network Accounts that you set up on your server. So the AEBS is using your Open Directory to determine whether someone is allowed to log onto your network or not. This adds an additional layer of security to your network and is especially useful in organizations where they have users coming and going and those users having the SSID and password necessitates constantly changing the password.
In this screencast I cover how to use the service built into OS X Server to manage your AEBS. I cover how to add new ports to the service for other applications that may need ports opened. I also cover how to set up and use the RADIUS service and talk about an application called Admin Tool Radius that can help you manage multiple RADIUS Networks and manually set up RADIUS if you are not using OS X Server for that service.
If you have any questions or comments feel free to leave them here or on my Youtube Channel.
Moving From Aperture Part 3: Aperture vs Lightroom

In this screencast I walk you through where things are in Lightroom for those of you coming from Aperture. I cover how each covers photo management, photo editing, and other features. Hopefully this screencast will help familiarize you with Lightroom so you can pick up where you left off.
If you have any questions or comments feel free to leave them here or on my Youtube Channel.
Moving From Aperture Part 2: Import to Lightroom 5
Adobe made waves lately with moving all of their applications to a monthly fee model instead of the traditional pay to own model of using their software. The logic is that they will be able to issue updates more frequently and it will be cheaper in the long run, especially for those who use Photoshop. One of the offerings Adobe has is a photographers bundle where you get Lightroom and Photoshop for $9.99 a month. When compared to the $149 price tag for Lightroom right now and the usual $79 upgrade price, with Photoshop thrown in, makes this a decent deal. Add in Lightroom Mobile and it seems like Adobe has put together a pretty good solution for photographers.
Lightroom 5 comes with a 30 day trial and will read the metadata that was exported through the Exporter for Aperture application which makes it easy to try out Lightroom to see if it is for you. In this tutorial I cover how to import your library into Lightroom 5. I also cover a few of the differences in how Aperture and Lightroom handle photo management. If you have any questions or comments feel free to leave them below or on my Youtube Channel.
Moving From Aperture Part 1: Exporter for Aperture

The first option for many would be just to wait and see what happens. Apple has announced that it will update both Aperture and iPhoto to work with it’s upcoming OS release Yosemite so there really is no reason to panic just yet. You can still use Aperture and iPhoto as always and there will be some way to migrate over to the new photos app in early 2015. If everything is working well for you in either program then you can stay put and see what happens.
For others who may be more on the pro or semi-pro level there may be some anxiety about how well this migration will work for them. Apple has had a history with pro apps of cutting features to make the transition happening and then slowly adding features back in. If you rely on Aperture for your business or you do a lot of editing you may want to consider other options instead of waiting to see what Apple may do. If you have been on the fence anyway this may be the time to check out other options.
The difficulty in trying out new options is the problem of library conversions. It is usually a pain to convert an entire library away from one proprietary system to another only to wonder if you will be converting back some day. Eventually everyone will convert to a new system at some time in their lives as software comes and goes so knowing there is a solution to help you make this transition so you can get all of your work out of a system is important.
Exporter for Aperture is a great application for helping you get all of your work out of Aperture without taking a lot of time doing it. This application allows you to customize a few things in deciding how you want your library converted and then does all of the work of moving your photos out of your Aperture library with all of your metadata baked in. Not only will it preserve your metadata, it will also export any of the photos you have made adjustments to as either JPEG or TIFF with those adjustments baked into the photo. It will do all of this without touching your existing Aperture library so you can test other photo management systems and still have your Aperture library in tact. So the only thing you would lose in the process is the actual slider location for your adjustments. Everything else gets exported and ready to import into another application like Lightroom.
In this screencast I show you how to use Exporter for Aperture step by step. I cover all of the settings and show you what it looks like to go through the export process. This really is an excellent application and well worth the $14.99 for all of the time and headache it saves you.
Leave a comment below or on my Youtube Channel and let me know what you are doing with your Aperture or iPhoto libraries. If you have any questions along the way feel free to leave them in either place and I will do my best to get back to.
Mavericks Server Part 37: Server Security Part 2: Icefloor 2
A software firewall is critical to those who have front facing servers which means their servers do not sit behind any physical hardware firewall. In essence most front facing servers have all of their ports open to the whole world so you need a software firewall to close the ports you don’ want open to secure your server. IceFloor is a front end to the built in PF firewall found on OS X Server. If you are not someone who likes to work through the Terminal, IceFloor has you covered. It’s graphical interface gives you access to all of the features found in the PF Firewall and gives you a visual way to customize and configure the firewall to fit your needs. It even has a built in wizard that will walk you through the process of setting up your firewall making it easy to configure.
In this screencast I cover installation and set up, how to open the ports you need to make your services work, and walk through all of the options included in IceFloor. If you have any questions or comments feel free to leave them below or on my Youtube Channel.
Mavericks Server Part 36: Server Security Part 1
In this screencast I cover some of the basics of server security. I cover some of the security features built into OS X Server. I cover the difference between a server behind a router and front facing, how ports work, the built in firewall, Little Snitch as security for in and out connections, when to use a full software firewall, and the basic log files inside the Server App.
If you have any questions or comments feel free to leave them below or on my Youtube Channel.
Mavericks Server Part 35: Mobile Accounts
But what happens when a user has a laptop that he/she takes outside the network on a regular basis? When this happens you really can’t host their home folders on the server because they will need access to them on the outside. Yes, they could use a VPN connection to log into their network account and have access to their desktop, but the process is slow and, depending on the bandwidth, could be almost impossible (If you are considering or would like to try to access your home folders remotely without mobile accounts, see my screencast on how to do that here
To make this particular situation work, OS X Server includes the Mobile Accounts feature. Mobile accounts is a service that keeps a user’s Mac in sync with the home folders found on the server. So when the user comes into the network their computer syncs with the server. This means any work done outside your network will now be on your server making sure you never lose any data. This also means your user can still log into any computer on your network and still have access to the work he/she did while offsite.
In this screencast I cover how to set up the Mobile Accounts Service. I go over how to enable the server on OS X Server and how to get it set up on your client machines. If you have any questions or comments feel free to leave them below or on my Youtube Channel.
Mavericks Server Part 34: Xcode Server
While I am not a coder myself, I was able to walk through the process of setting up the Xcode Server and the various features built into the service. So in this screencast I cover the basics to show you how to get started with the Xcode Server. For those of you who do code, you’ll have to let me know how well it works and if it is a valuable part of your work flow. Also, if I missed anything or got anything wrong, let me know so I can pass it on to others.
If you have any questions or comments feel free to leave them below or on my Youtube Channel.
Launchbar 6 vs. Alfred 2
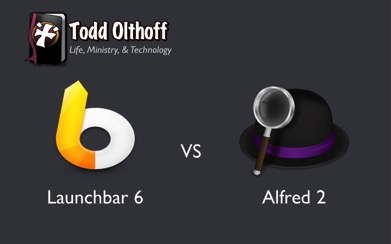
Well just a couple of weeks ago the guys over at Objective Development decided to release an update to Launchbar and introduced Launchbar 6. From the looks of it I could see that it had gotten a make over and added the larger interface I had wanted and a few new changes and tweaks to the services it could perform. So being the launcher addict that I am, I had to take a look at it. I was happy with Alfred but I couldn’t leave enough alone and now I am trying to decide which one I like best. In my quest to decide which one to go with, I made a list of features and compared them side by side. In doing this I determined that they are both very similar and capable applications. They really do overlap in a lot of ways in terms of their features but they differ when it comes to how they chose to implement some of those features.
Now I am still confused on what to do and I am still playing with both to figure out which one I will land on long term. So I decided to do a screencast to show you what I found and in the hopes that maybe it will help you decide which one is for you, or at least let you see what has changed with Launchbar 6. Really they are both very similar, with a few nuances which really means you can't make a bad decision either way. Both can be customized to almost match each other's features so it really comes down to what you want built in and what you want to customize (I'm still trying to decide myself they are so close!).
I would love to know your thoughts and which launcher you landed on. Let me know what you think by leaving any questions or comments below or on my Youtube Channel.
Mavericks Server Part 33: NetInstall
In this screencast I focus on how to set up the NetInstall service in OS X Server. I cover how to create a disk image, how to customize the image to fit your needs, and how to set up and use the service once you have everything configured. If you have any questions or comments feel free to leave them below or on my Youtube Channel.
Mavericks Server Part 32: DHCP Server
In this screencast, I cover how to set up the DHCP service in OS X Server. I cover pros and cons of using OS X Server's DHCP service as compared to a router. I also cover how to set up an Airport Extreme Base Station to work with server's DHCP service, walk you through all of the settings in the DHCP service, and cover how to set up static IP reservations for the clients on your network. If you have any questions or comments feel free to leave them below or on my Youtube Channel.
Mavericks Server Part 31: FTP Server
Built into OS X Server is an FTP service that let’s you specify a folder you want to use for your uploads. The service does not allow you to specify multiple folders or to set up nested folders inside that one folder with different sets of permissions for each so if you need that kind of detail, you will have to use another method as server’s FTP service is very limited.
In this screencast, I cover how to set up the FTP Service in OS X Server. I cover how to choose an FTP folder (OS X Server only allows one), how to set the permissions for who has access, what ports to open, and how to connect to your FTP share using Terminal and an FTP Client (Forklift in this case). If you have any questions or comments feel free to leave them below or on my Youtube Channel.
Mavericks Server Part 30: Wiki Customization
If you have any questions or comments feel free to leave them below or on my Youtube Channel.
Mavericks Server Part 29: Wiki Server Set Up
In this screencast I cover how to set up OS X Server's built in Wiki Server. I cover how to set the permissions for the service and make sure your wiki content is accessible from an iOS Device. I also cover all of the features of the server including how to set up wiki's for your various work groups. If you have any questions or comments feel free to leave them below or on my Youtube Channel.
Mavericks Server Part 28: Website Server
In this screencast I cover how to configure and set up the Website Server to host your website. I cover how to set up the website service on OS X Server. I cover the built in website and it's services, what each of the settings does, how to create your own website including how to set up DNS, add your website files, and test your new website. If you have any questions or comments feel free to leave them below or on my Youtube Channel.
Mavericks Server Part 27: Mail Server
In this screencast I cover how to set up the Mail Server in OS X Server. I cover the configuration process including setting up DNS on your server and at your domain provider. I also cover all of the settings to make sure your Mail Server is configured correctly. If you have any questions or comments feel free to leave them below or on my Youtube Channel.
Mavericks Server Part 26:Caching Server
The Caching service cache’s downloads and updates from the Mac and iOS stores. It not only keeps a copy of system updates but any application or iBook you download. To have your client devices point to your server for the updates and downloads is zero configuration. The devices automatically check for a cached download and the same network and if they find that update they use the one on the server instead of downloading a new copy. Of course you need lots of space if you are storing copies of your downloads so you will need a decent sized hard drive and you can limit the size the Caching service can use to store those updates.
In this screencast I walk you through the Caching service. I help you get it up and running and show how it works and how to track the type and size of updates you have on your server.If you have any questions or comments feel free to leave them below or on my Youtube Channel.
Mac Power Users: OS X Server
If you have any questions about anything we talked about on the show, feel free to send me an email, leave a comment, or connect with me on twitter using @tolthoff.
Mavericks Server Part 25: Software Update
To help you better manage your network and make it more efficient, OS X Server has a built in Software Update Server that let’s you download the updates once and then have your users look to your server for their updates instead of all going to Apple’s Servers. It also allows you to control which updates your users have available to them. This comes in handy when an update breaks something else and you want to block your users from using that update. Because they are coming to your server for the update, you control what updates they see and can use.
In this screencast, I walk you through how to set up and manage Software Update on OS X Server. I also cover how to set up your users to point them towards your server for updates. If you have any questions or comments feel free to leave them below or on my Youtube Channel.
Macworld/iWorld 2014 Recap

This year I had the chance to have breakfast with the community people who work with Don McAllister on ScreenCastsOnline. Don is one of the nicest guys I have ever met and he is brilliant at content development and screencast tutorials. Everything I do with screencasts I learned from Don and I am humbled to be a part of ScreenCastsOnline and I continue to learn new things that make me a better screen caster. If you haven’t had a chance to check out ScreenCastsOnline, I highly recommend you do so as Don is the best in the business and the group of people who work with him on the ScreenCastsOnline Magazine are an incredible group of people and experts in the podcast/publishing/video community.

I also had the privilege of going to the Nosillacastaways Party hosted by Steve & Allison Sheridan from the Nosillacast and podfeet.com. It was an awesome party where I was able to meet a number of people including Chuck Joiner from MacVoices. Chuck is a great guy and I look forward to connecting with him more in the future. I also got to talk with the Nosillacastaways who couldn’t be there via a Google Plus Hang Out. You gotta love the fact that people were able to telecommute to a Mac event! Steve and Allison are incredible hosts and I really appreciated the fact that they put that event on every year. I look forward to next year!
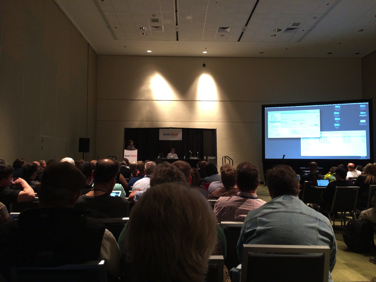

On the show floor I met a doctor who developed a magnetic ring that lets you easily secure your iPad to your hand without worrying about dropping it called Bakbone. Hearing his story of how he developed this for the medical field and it just took off as other people wanted to use it as well. It was cool to see he was as surprised at how well it was working as anyone else. He was a really great guy and the product is great in its simplicity. You can check it out here: http://www.thebakbone.com.
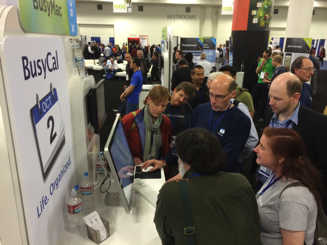
Overall, Macworld/iWorld is a great event and I look forward to attending and connecting with everyone again next year!
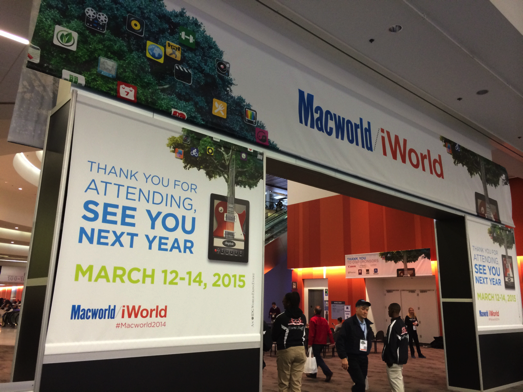
Mavericks Server Part 24: Profile Manager Device Management
In this screencast tutorial I cover how to manage your Mac and iOS devices using Profile Manager. I cover the information Profile Manager provides on each of your enrolled devices. Then I talk about strategies for managing your devices and go over the various settings you can push to your devices using profiles.
If you have any questions feel free to leave them below or on my Youtube Channel and I’ll do my best to get back to you.
Mavericks Server Part 23: Profile Manager Users & Groups
In this screencast tutorial I cover how to manage your users and groups using Profile Manager. I cover some strategies for when to use groups and when to use users in setting up your profiles. Then I walk you through each of the payloads that are available to customize and push to your users and groups.
If you have any questions feel free to leave them below or on my Youtube Channel and I’ll do my best to get back to you.
Mavericks Server Part 22: Profile Manager Restrictions & Settings
In this screencast I go over each of the restriction settings. I also cover the basic settings found in each of the tabs in the Profile Manager Web Interface including how to access information on each of your users and devices.
If you have any questions feel free to leave them below or on my Youtube Channel and I’ll do my best to get back to you.
Mavericks Server Part 21: Profile Manager iOS Enrollment
In this screencast I cover how to enroll your iOS devices into Profile Manager so you can manage them and push changes. I cover how to install the profiles you will need to enroll your iOS devices including the proper order you will need to install them. I also cover how to install the basic configuration profile that adds services you have previously set up like calendar, contacts, and VPN to your iOS devices.
If you have any questions feel free to leave them below or on my Youtube Channel and I’ll do my best to get back to you.
Mavericks Server Part 20: Profile Manager Mac Enrollment
In this screencast I cover how to enroll a Mac in the Profile Manager Service. I cover where to go to get the profile you need to install. I also cover the order in which to install those profiles and how to know your Mac’s have been successfully enrolled.
If you have any questions feel free to leave them below or on my Youtube Channel and I’ll do my best to get back to you.
Mavericks Server Part 19: Profile Manager Set Up
Profile Manager is designed to help you manage the settings and services your users and devices can have access to. It allows you to set up your services and permissions once and then push those changes to all of your users and devices. It really does make managing your clients a much easier process and allows you to do so remotely without having to be in front of each machine.
In this screencast I cover how to set up Profile Manager on OS X Server. I walk you through each of the settings included with the service and walk you through the set up process.
If you have any questions feel free to leave them below or on my Youtube Channel and I’ll do my best to get back to you.
Mavericks Server Part 18: Server Back Up
Backing up your server is different than the Time Machine Service built into OS X Server. The built in Time Machine Service inside OS X Server is designed to back up client machines not the server itself. You have Time Machine on the server that you can use to back your server up to a connected drive. So Time Machine is available just not through the server app. But a Time Machine back up is not going to get you up and running in a hurry so you will need other strategies to make sure you have options. In this screencast I cover a Server back up strategy that includes, incremental back ups to Time Machine, a bootable clone of your server so you can recover quickly, and strategies for backing up your Open Directory and services.
If you have any questions feel free to leave them below or on my Youtube Channel and I’ll do my best to get back to you.
Mavericks Server Part 17: Time Machine
In this screencast I cover how to set up the Time Machine Service. I also cover how to connect your users to the back up, set a limit on the size of each back up, and how to monitor your back ups to make sure they are working properly. As always, feel free to leave a comment here or on my Youtube Channel.
Mavericks Server Part 16: VPN
In this screencast I cover the VPN service built into OS X Server. I go over how to set up your VPN service, set your router to allow those connections, and cover how to set up your client machines to use VPN.
If you have any questions along the way feel free to leave a comment here or on my Youtube Channel.
Mavericks Server Part 15: Messages
Built into Maverick Server is a private messaging system called Messages. This service allows you to set up your own iMessage Server so you can have private chats with other clients on your server and the messages you create are stored on your server not in the cloud. This is great for highly confidential communications or for those who just want to make sure they know who is being communicated with for safety reason such as monitoring your kids use of iMessages.
In this screencast I cover how to set up the Messages Service. I cover all of the various settings and how to set up the client machine to use your Messages Service. I also cover how to auto set buddy lists using groups so all of your chat buddies automatically show up in your buddies list without having to add them manually.
As always if you have any questions or comments feel free to leave them here or on my Youtube Channel.
Mavericks Server Part 14: Contacts
In this screencast I cover how to set the service up. I also cover how to set up your client machines to work with your OS X Server Contacts Service. In addition I cover how to set up a joint contacts account that all of your users can use for their contacts service so everyone can share a joint contacts list. This can come in handy for couples or family that want to share their contacts in one centralized list.
If you have any questions feel free to leave a comment here or on my Youtube Channel.
Mavericks Server Part 13: Calendar
As always if you have any questions or comments feel free to leave them here or on my Youtube Channel. Thanks for all your support!
Mavericks Server Part 12: Connect & Automount AFP
In this screencast I cover how t connect to your AFP shares using a couple different methods. I also cover how to set up your shares to auto mount to your Mac at start up. As always, if you have any questions feel free to leaver them here or on my Youtube Channel.
Mavericks Server Part 11: File Sharing & Home Folders
If you have any questions feel free to leave a comment here or on my Youtube Channel.
Mavericks Server Part 10: Bind Clients to Server
In this screencast, I cover how to bind your Mac clients to your server’s Open Directory. I walk through the steps needed to perform the bind and talk about the difference between authenticated and anonymous binding. If you have any questions feel free to leave a comment below or on my Youtube Channel.
Mavericks Server Part 9: Users & Groups
In this screencast I cover how to set up your users, how to tell the difference between a network and local user and the advantages of each, and finally how to set up groups and manage your users in those groups. If you have any questions or comments, feel free to leave them here or on my Youtube Channel.
Mavericks Server Part 8: Open Directory
As always if you have any comments or questions leave them below or on my Youtube Channel.
Mavericks Server Part 7: SSL Certificates
In this screencast I cover how to set up SSL Certificates in Mavericks Server. I talk about how to use a self signed certificate which is not validated by any outside source. I also cover how to set up a third party certificate and the process of purchasing, requesting, and installing this certificate so it works with your server.
As always if you have any questions feel free to leave a comment here or on my YouTube Channel.
Mavericks Server Part 6: DNS
In this screencast I cover how to set up DNS in OS X Server. I cover how to start over in setting up your records. I also cover all of the records and what they mean and what services they are used for. I also talk about how to set up your DNS information on your domain name registrars site so everything gets to where it needs to be.
As always, feel free to leave a comment here or on my YouTube Channel.
Mavericks Server Part 5: Port Forwarding
If you are concerned about security and want to make sure there are locks on the door, you could set up an encrypted connection using SSL (secure socket layer) certificates which we will cover in a future screen cast. This service changes the door to port 443 for web service and secures the connection between the two machines. It also validates identity and works like a key to the door.
In this screencast I cover how to set up port forwarding using an AEBS and letting the Server App handle the set up. The beauty of using OS X Server with an AEBS is the port management is built into the app and the ports are opened and closed without requiring a reboot.
As always, feel free to leave a comment here or on my YouTube Channel.
Mavericks Server Part 4: Network Configuration
In this screencast I show you how to set up a network using an Airport Extreme Base Station (AEBS) where I am allowing the AEBS to handle the DHCP or addressing of all the devices on my network and it also handles the NAT or port forwarding duties as well. In this set up you make sure your AEBS is giving your server a reserved IP address and is pointing to your Server for internal DNS. In other set ups you may have your Server handling DHCP duties as well or if you have a front facing server you might not even have a router so you will be locking down your server with a software firewall that can also be configured to handle NAT if you choose to set it up that way. That set up is beyond the scope of this screencast but I may do one in the future to show how it works.
As always if you have any questions or comments feel free to leave them below or on my YouTube Channel.
Mavericks Server Part 3: Basic DNS & Server Set Up
In this screencast I also cover some of the basic server settings found in the server tab. These settings help you set up how you want to access your server remotely and I cover each of hose settings and what they do.
If you have any comments feel free to leave them here or on my Youtube Channel.
Mavericks Server Part 2: Install & Set Up
If you have any questions feel free to leave a comment here or on my Youtube Channel.
Mac OS X Mavericks: Clean Install Walkthrough
Overall the install process is pretty smooth but does take some time. One tip, when you hist less than a minute remaining you are looking at waiting more than a minute and in some cases could be 20 minutes or more so don’t stop the install if it seems to get stuck. Give it some time and should finish the install.
If you have any comments or questions leave them here or on my Youtube Channel.
Mavericks Server Part 1: Upgrade from Mountain Lion Server
With that in mind, I cover how to upgrade to Mavericks Server and walk through the entire process. The upgrade is pretty simple and goes rather smoothly with the exception of the issues mentioned above.
If you have any questions feel free to leave a comment here or on my Youtube Channel.
Upgrading to Mavericks (10.9): A Step by Step Walkthrough
So I put Mavericks through its paces and I have to say the upgrade when as smooth as it could have gone with a couple of issues. One is not to believe the timer when it says you have less than a minute remaining. I found both times I saw that status it actually took from 30 to 40 minutes to complete. So that being the case, make sure you don’t stop the process thinking it is hanging just be patient and it will eventually finish the upgrade. Second, you will have to give permission to the apps that use keychain or contacts because of the changes Apple made in those areas. So expect to have to answer a bunch of pop ups once the process if complete.
Below is the screencast showing my upgrade process step by step. If you have any questions or want to leave a comment you can do so here or on my Youtube Channel.
Mac OS X Mavericks: Prepare Your Mac for the Upgrade to 10.9
1. Making sure your Mac qualifies for the update.
2. Checking your applications to make sure they are Mavericks compatible (go to www.roaringapps.com).
3. Check your hard drive and permissions using Disk Utility.
4. Make a bootable clone using SuperDuper! or Carbon Copy Cloner.
In this screencast I walk you through the steps to prepare for the upgrade. I walk through what to do to prepare so you will be ready when the upgrade comes out. As always feel free to leave a comment here or on my Youtube Channel.
Launch Center Pro 2.0: Action Based Productivity for iOS 7

Launch Center Pro is a productivity app that looks to limit the number of actions you need to take to get something done. Need to send a text out to a group of people but don’t want to put in the addresses to go through the steps? No problem! Tap once into Launch Center Pro and click on the action to send a text. You are taken right to an empty text field with all of the names of your group already addressed in the “to” line. Want to upload a photo to Dropbox, copy the link and send it in an email? No problem. with one tap all of those functions happen.
Launch Center Pro 2.0 really is an incredible app for iOS7 to improve your productivity. I have many people ask me to compare this app to Drafts which allows you to take action on snippets of text in a similar way. To me the difference is this, I use Drafts when I have text that needs to be acted on and Launch Center Pro for all other actions that take multiple taps to complete.
In this screencast I cover how to use Launch Center Pro 2.0 and walk you through many of its features. As always if you have any questions or comments feel free to leave them here or on my Youtube Channel.
iPhone 5s Fingerprint ID: A Step by Step Walkthrough

In this screencast I walk through the process of setting Fingerprint ID up and how it works. If you have any questions or comments, feel free to leave them here or on my Youtube Channel.
iOS 7: Strategies for Improved Battery Life
In this screencast tutorial I cover some of the things I discovered that helped improve the battery life of my new iPhone 5s. I go over each and every setting that seems to effect battery life so you can fine tune your own battery experience. It is always a trade off between features and the function of your battery so you don't have to use everything I cover here but as you fine tune your own settings you should hopefully get your battery to where you want it to be.
As always if you have any questions or comments feel free to leave them here or on my Youtube Channel.
Upgrading to iOS 7: A Step by Step Walk Through
It has been great to see the response to this video with a lot of different people picking it up including Allison Sheridan from the Nosilla Podcast which I listen to. I have had a few questions along the way with people wondering if it will mess up their jail break (yes it will) and wondering if they really need to back up (yes you should). If you have any questions feel free to leave them below or on my Youtube Channel.
Reflector: Mirroring Your iOS Device on Your Mac
Reflector allows you to mirror your iOS devices to your Mac using Airplay. Not only does Reflector do a great job of mirroring your iOS screen to your Mac, it also puts the device bezel around your screen and even lets you choose the color (white or black). This really works great for demonstrations because it allows the user to see the actual device instead of just looking at the screen and wondering what they are looking at until their eyes adjust.
Reflector also has the added feature of allowing you to mirror multiple devices at once. So if you are trying to demonstrate the interaction of one device to the other, you can show both devices on your screen and operate them independently at the same time and still capture both screens. This can really come in handy depending on what you are trying to demonstrate.
So in this screencast I demonstrate how Reflector works so you can get an idea of how I do my screencasts. Of course I record these screencasts with Screenflow, the best screen capture and editing software I have ever used. Someday I'll do some screencasts on how I do my screencasts which will feature Screenflow.
Feel Free to leave any comments or questions below or on my Youtube Channel.
Everpix Part 1: Mac Set Up & Web Interface
In this screencast I walk you through the set up of Everpix. I also cover the web interface and walk you through the various options for viewing and sharing your photos. If you would like to try Everpix and would like an extra 6 months of photo viewing on the service you can use my link here (of course I get 6 months as well
Managing Your iCloud Storage
What I discovered was I was backing up 3 iOS devices which was taking up the majority of data mainly because of photos an videos that were being backed up. These things were causing the spike in my usage and I had to take care of that or may backups would cease. If you are in the same boat, I would recommend the following:
- Turn off backup for your camera roll.
- Remove any large files you may have added to iCloud by looking at the Apps section of iTunes.
- Use a program like PhoneView to move your videos and other files to your Mac and back them up there.
In this screencast I walk you through how to do each of the things above. As always if you have any comments or questions leave them here or on my YouTube Channel,
Plex Media Server Part 3: Accessing Your Media Remotely

In this screencast tutorial I cover how to access your media remotely. I take a look specifically at the myPlex web interface and the iOS application. I also demonstrate how you can add media from around the web on the fly into your Plex interface so you can view it on your favorite media device. Plex really is an excellent media server and for a free application it really is incredible! If you want more features you should also consider the Plex Pass which is a paid subscription. For limited time they have a lifetime subscription which really looks like a steal with all the development they have been doing!
As always thanks for all your support! If you have any questions or comments feel free to leave them here or on my YouTube Channel.
Plex Media Server Part 2: Editing Metadata
In this screencast tutorial I cover how to edit the metadata for your media. I show examples of how Plex could get it wrong and what you need to do to make the changes and make sure those changes stay and don’t get updated again in the future.
As always, thanks for your support! If you have any questions or comments, feel free to leave them here or on my YouTube Channel.
Plex Media Server Part 1: Installation & Set Up
Plex is a media server with a lot of the features most people want in a home media server. Plex combines Movies, Television, Music, Photos and Web services into one easy to use and set up application. Plex automatically pulls the metadata for your media and does a great job presenting it inside the Plex interface. The Plex Media Manager is a web based application so you can access it anywhere you internet access. Combine that with their applications and services for so many different devices and Plex really is a great media server for your content.
In this weeks tutorial I cover how to install and get Plex set up. Next week I’ll cover how to edit and tweak your Media. If you have any questions feel free to comment here or on my YouTube Channel.
Monitoring Your Server With iStat for iOS
In this weeks screencast I cover how to monitor the physical state of your server using an iOS application called iStat. iStat is a universal iPhone and iPad application that monitors everything from the heat sensors to the fan speed on your Mac. Check out this screencast to see how it works!
If you have any questions or suggestions feel free to leave a comment here or on my YouTube Channel.
Online Back Up With Backblaze
1. Hardware will fail at some point.
No matter how well you take care of your computer, hard drive and other electronics we all know that our hardware will fail at some point in the future. It is usually before we think it will happen so it surprises us, but we know it will take place. When it does fail, many times it fails beyond recovery, meaning all of you data could be lost forever.
2. A good backup strategy includes multiple copies
A good rule of thumb is, one copy is good, multiple copies is better. The more copies the more you minimize your risk of losing data.
3. Location of those back ups can be as important as how many backups you have.
You have to take into account the fact that having all your backups in one place means you have a single point of failure. If they are all at your home and get stolen or burned up or damaged by water or some other force of nature you have lost all of your data. If you have your data in multiple locations (at least one more besides your home) you still have your data even if you lose your local copy.
With this in mind, here is my strategy. First, I have a time machine back up of my data. This gives me an incremental back up just in case I accidentally delete something I want to get back. I can go back in time and get it with Time Machine. It also serves as one complete back up. Second, I use a Drobo as an external drive for those backups so if one hard drive fails my data is still safe. Next, I use SuperDuper! to make a bootable clone of my main drive so if that one fails I can boot from this backup and keep working as if nothing happened until I get an internal drive replacement. Finally, I back up to Backblaze online to handle my offsite back up. For things I really don’t want to use like family photos, etc. I back those up to another external drive that I store in a safe place.
With that in mind, I did this tutorial on Backblaze for offsite back up. Backblaze has been a great service that integrates well with the Mac and allows you to set it and forget it. It continually backs up in the background. Whatever strategy you use, be sure to keep all of these possibilities in mind (I’m sure I’ve forgotten some but at this point this is the extent of my own paranoia on the topic of backup
Feel free to leave a comment here or on my YouTube Channel!
Mountain Lion Server: Changing Local to Network User
In this screencast tutorial I cover how to change a local account to a network account and move the users local files over to the server to allow network access from any computer on your network.
As always if you have any questions or comments feel free to leave them here or on my YouTube Channel.
Mountain Lion Server: Remote Time Machine Backups
In this screencast tutorial I cover how to set up your portable Mac to enable remote Time Machine backups. This allows your backups to happen over the internet back to your server and allows you to create your very own cloud back up strategy. A couple of things to keep in mind with this approach. First, this is not the complete back up solution. You are protected from hardware failure but if your house burns down you lose your back up. So you will need to consider other offsite back up. Second, this is not foolproof. Because of things like bandwidth and internet interference you could cause your back up to get corrupted if you have major interruptions. So just because it is possible I would caution you in using Time Machine this way. Like anything else your mileage may vary so I want to make sure I put in that warning to start!
As always feel free to leave a comment or question here or on my YouTube Channel.
Mountain Lion Server: Remote Network Account Access
To make this work you can use Mobile Accounts (which I covered in another screencast HERE) which will keep those home folders in sync between your server and the local portable Mac as a solution. Or you can have your users log into their network accounts over the internet and still have access to them. There are pros and cons to each solution with the obvious one being network and server bandwidth which directly impacts speed.
In this screencast tutorial I cover how to set up your portable Mac to allow your users to connect to their network accounts over the internet. I also cover how to connect and log into their account through your Open Directory remotely.
As always, feel free to leave any comments or questions below or on my YouTube Channel.
Mountain Lion Server: Changing Your Host Name
In this screencast tutorial I walk you through how to change your Host name. I also cover the services you will need to update once that change is done to make sure you don’t have any of your services break in the process.
As always feel free to leave a comment here or on my YouTube Channel.
Little Snitch Part 3: Profiles

Little Snitch 3 provides a profile feature that allows you to have different sets of rules for different networks. So when I am at home there are one set of rules for home. When I am at a coffee shop, there is another set of rules and Little Snitch 3 keeps track of where I am and automatically switches to the rules I have defined for that spot. It really is a great feature because it does have a set it and forget it set up.
In this screencast I cover profiles and how to set those up in Little Snitch 3. As you will see, this really is a great feature set and one you will use a lot with your mobile Macs!
Little Snitch Part 2: Rules
Little Snitch also gives you suggestions of rules you might want to implement and sets up temporary rules for you to look at and decide if you want to keep or discard them. It really is a great way to keep tabs on your entire network and set up a rule set that you are comfortable with.
One thing I always have to let people know about Little Snitch is the pop ups that warn you of connections can seem overwhelming at first. With every connection asking for your permission to accept or deny you really get a good sense for how many programs are trying to connect. But with all of those connections at first you can feel like the program is getting in your way. If you stick with it and go through all the pop ups and make decisions on what you want to allow and what you want to deny, over time these will become fewer and fewer and you will have the protection and limits to access that you wanted with very little hassle. So stick with it as this really is an incredibly useful tool!
Little Snitch Part 1: Network Monitor
Little Snitch provides a great solution to this problem. With it’s network filtering, it lets you see on a connection by connection basis who is trying to get into your computer from the outside and who is trying collect data from your computer from the inside. This network filtering puts you in control of each of these connections and even lets you set up rules for different locations or networks that you might connect to with your mobile Macs.
In this screencast, I give an overview of Little Snitch 3 focusing mainly on the network filter. I cover the basics of the application and all the features present in the network filter including how to get a reading of your current network and how to take snapshots in time to review later.
If you have a server, Little Snitch 3 is a great tool to help you keep tabs on your server and gives you a moment by moment opportunity to block those who may be trying to access your server.
Mountain Lion Server: Hosted Mac Mini Server
The MacStadium team has been great and I really see the value in the products they have to offer. You can see more about MacStadium’s services at their website www.macstadium.com. If you do happen to decide to host your server, I there are various tutorials up on their blog, some of which I have been contributing on how to get your Mountain Lion Server up and running in a hosted environment.
In this screencast tutorial I give an overview of having your Mac Mini Server in a hosted environment. I cover the differences between a home hosted versus data center hosted server, some of the costs and benefits of a hosted server, and some of the basics of logging in and working with a server in a hosted environment.
As always feel free to leave a comment below or on my YouTube Channel!
Mountain Lion Server: IceFloor Firewall
In this screencast tutorial I cover some advanced firewall administration for the built in PF Firewall using a donation ware software program called IceFloor. I cover how this software may be helpful for home users, how to set the software up, what settings to put in place, and ways to customize and test your firewall.
As always feel free to leave a comment below or on my YouTube Channel if you need any help or have any questions.
Mountain Lion Server: SFTP
In this screencast I cover how to connect to your files and folders remotely using SFTP. SFTP is more secure that FTP and is a great way to navigate remote file systems. I talk about how to set up SFTP, how to connect to your shares both through the terminal and through an app called Forklift. I also cover some basic commands to move files from one server to another.
As always if you have any questions or comments, feel free to leave them here or on my YouTube Channel.
Mountain Lion Server: SSH
In this tutorial I show you how to access your server remotely and how to copy files back and forth using terminal. In the next screencast I will cover how to do this using the more easy to use SFTP through a file management program called Forklift.
As always feee free to leave a comment here or on my YouTube Channel.
Mountain Lion Server: RADIUS Set Up
As always, feel free to leave questions or comments below or on my YouTube Channel.
Mountain Lion Server: Splashtop iOS Screensharing
Some of the controls do take some getting used to but there is a handy guide to help explain how each of the services work. The latency is really good and it makes it a great tool for every server administrator to have. As always, if you have any questions feel free to leave them below or on my YouTube Channel.
Mountain Lion Server: Server Admin Remote
In this screencast I cover how to download, set up and use the application on your iPhone. This really is a great little app and should come in handy for helping you check in on your server. If you have any questions or comments feel free to leave one below or on my YouTube Channel.
Mountain Lion Server: Firewall Set Up
In this weeks tutorial I cover how to set up the built in firewall on OS X Server. I cover the basic set up and various options found in the GUI built into system preferences. In a future screencast I will cover how to run the server with the command line and a third party GUI called Icefloor.
As always if you have any questions feel free to leave a comment here or on my YouTube Channel.
Mountain Lion Server: Server 2.2.1 Update
Here are some of the main changes:
1. Caching Service: This allows you to cache any updates that have been downloaded from the Mac App Store so they don’t need to be re-downloaded. I covered this in detail in a previous screencast.
2. Centralized SSL Certificate Management: Apple took the SSL Certificate management out of the Server hardware area and moved it to it’s own service. I cover the changes in detail for those who had difficulty with the new interface.
3. Time Machine: Changes include seeing which computers are backed up, when they were backed up, and the size of the back up.
As always feel free to leave comments here or on my YouTube Channel.
NEW! All Video Tutorials in One Place
I have had a lot of feedback lately asking me to put all of my tutorials on my website in an easy to view format. Some of you don’t like using the YouTube interface and would prefer to come to the website instead to view the tutorials in one place. So to make it easier, I have added a section to my website on Technology which includes all the tutorials sorted by topic. It is a start and I still have things I want to do make it better but I think it will make it easier for you to view them in order instead of using the playlist feature on my YouTube Channel.
I also included a donate button for those who want to buy me a cup of coffee (Starbucks is one of my regular hang outs) for the work on the tutorials. Please don’t think you have to donate to use the tutorials, I am just doing this for those who wanted to do something but didn’t have a way to do it.
If you get a chance to check the tutorials section out, give me some feedback on what you think and how I could improve it. You can email me or leave a comment here.
I love doing these tutorials and helping others with things I have learned. I also love to hear how they help others so drop me a line if you get a chance.
Mountain Lion Server: Mobile Accounts
To solve this problem, Server has the ability to set up mobile accounts where basically sets up a sync service that keeps your home folder in sync between the server and the client machine. Before a client leaves the network, the home folder syncs to the client machine. When the client comes back into the network, any changes the client has made get sync’ed back to the server to keep everything the same. This way the client can still log into any computer on your network and still take their laptop on the go.
As always, feel free to leave a comment here or on my YouTube Channel. Thanks for watching!
Mountain Lion Server: Work Group Manager Preferences
Work Group Manager can still be used to manage all of your users, groups, devices and device groups in a non web interface on your server. It still works well and gives you another option for setting up your server.
As always feel free to leave a comment here or on my YouTube Channel. Thanks for watching!
Mountain Lion Server: Bind Clients to the Server
In this video tutorial I cover how to set that up properly. I also cover the process for binding your clients to the server and what it looks like in Work Group Manager.
As always feel free to leave a comment here or on my YouTube Channel. Thanks for watching!
Mountain Lion Server: Work Group Manager Overview
In this screencast tutorial I cover how to download and install Work Group Manager. I give a basic overview of the application and cover how to use it to work with users and groups on your server.
As always, thanks for watching. Feel free to leave a comment here or on my YouTube Channel if you have a question.
Mountain Lion Server: Remote Server Access
In this screencast tutorial I cover how to connect to your server remotely. I demonstrate a couple of ways to do this and how to make sure you set it up properly without accidentally installing the server components on your non server device.
As always feel free to leave a comment here or on my YouTube Channel. Thanks for watching!
Mountain Lion Server: NetInstall
In this screencast tutorial I cover how to set up a disk image to be used for your NetInstall. I also cover some of the customization options to simplify the install process and then show how the process works.
As always feel free to leave a comment or question here or on my YouTube Channel. Thanks for watching!
Mountain Lion Server: DHCP
As always feel free to leave a comment here or on my YouTube Channel. Thanks for watching!
Mountain Lion Server: Connecting iOS to WebDAV
In Mountain Lion Server you can specify certain folders to be available to your iOS device and then connect to those files through the WebDAV interface built into your iOS device. This makes all of your files portable and allows you to use them where you are at on the road (provided you have a public domain address or VPN).
In this screencast tutorial I cover how to connect to those files and folders you designated for sharing with iOS devices. I cover how to do this in a couple of apps to give you an idea of how it works. As always, please feel free to leave a comment here or on my YouTube Channel.
Mountain Lion Server: Wiki Customization
As always, thanks for checking out my tutorials. If you have any questions feel free to leave a comment here or on my YouTube Channel.
MacWorld/iWorld
While I'm there I'll have the opportunity to meet Don Mcallister who is making the trip from the UK. I have watched Don's screencasts from ScreenCastsOnline for many years and if you haven't heard of him or checked out ScreenCastsOnline and you own a Mac you really should check it out. You can get the screencasts as standalone tutorials or subscribe to the ScreenCastsOnline Monthly Magazine and view them in a magazine format with articles by leading Mac experts. I have had the privilege of collaborating with him lately with screencast content and it has been awesome working with and learning from Don. We are finally going to connect face to face.
I am also looking forward to attending the Omnifocus 2 unveiling party happening on Thursday night which will be presented by David Sparks, Merlin Mann, and Ken Case from the OmniGroup. It will be a lot of fun to check out the updates and be able to get early access to the private beta. I'll have to let you know how it looks! On Friday night I look forward to going to the Nosilla Castaways party on Friday night to meet Allison and some of the other podcasters I have heard but haven't met yet. Of course we'll also attend some of the workshops and roam the show floor. It should be a great trip!
I'll try to put updates on my twitter feed so if you are not following my on Twitter by sure to follow me @tolthoff. I'll also try to follow up with a blog post sometime next week.
Mountain Lion Server: Wiki Set Up
In this screencast tutorial I go over how to set up the Wiki Service which functions along side the Website Service to create the built in Wiki Website. I also give a basic tour of the site to give you an idea of what you can do with it. In the next screencast I will cover how to customize your site to make it your own.
As always if you have any questions, feel free to comment here or on my YouTube Channel.
Mountain Lion Server: Web Server
1. Does your ISP block port 80?
If your ISP blocks port 80 then you will not be able to host your own website as that is the port that those outside your network will use to access your site. You may have to call your ISP to see if there is a way to open that port. In many cases they will want you to purchase their business internet service which is usually more costly but does come with a static IP address which helps with the next issue.
2. Do you have a static IP address?
If you are using a dynamic IP address, which most home users are, you are leasing an IP address that could change at any moment. Once this IP address changes all of your web services will go offline until you discover the change and update your domain registrar to point your domain name to the new IP address. This will cause your website to be down until you make the change. Now most ISP's don't change the IP that often. It usually happens when you reboot your modem, but the risk of it changing might be too big, especially if you are dependent on having your website up and running 24/7. For home users who are only doing this for family it is not as critical, but for the rest, you really need a static IP.
3. Are you ok with Downtime?
Running a web server that hosts critical websites means that uptime of your sites is up to you and your server. So if you have a power outage and your server goes down, so does your website. If you forget you are hosting a site and turn off your server, you lose your site. So you really need to weigh the costs before you decide to do your own hosting.
Hopefully that gives you some things to consider before hosting your site. In the tutorial I cover how to get your site going and even how to set up virtual hosting if you are looking at hosting various domains/websites on your one server. This includes a look at the DNS service so if you haven't covered that yet, you may want to view my tutorial HERE.
Thanks for watching! If you have any comments or questions leave them here or on my Youtube Channel!
Mountain Lion Server: Profile Manager-Devices
As always feel free to leave a comment or question here or on my Youtube Channel. Thanks for watching!
Mountain Lion Server: Profile Manager-Users & Groups
I cover each of the settings in both the User and Groups screens. I also share my own strategy of using groups to manage users instead of having to update each individual user’s profile one at a time. In the next screencast I will cover how to set up device specific profiles which is another great way to manage the settings on your network.
As always, if you have any questions feel free to leave them here or on my Youtube Channel. Thanks for watching!
Mountain Lion Server: Profile Manager-iOS Enrollment
In this particular screencast I go over how to get your iOS device enrolled in Profile Manager so you can manage that device and push profile changes to it over the air. As I demonstrated in the previous screencast, you need to first install the trust profile if you are using a self signed SSL Certificate before you do any other installations. Forgetting this step will cause Profile Manager not to work and you will waste hours of tweaking for no benefit. After that profile is installed you can then install your other settings and make changes in Profile Manager itself that will be pushed to all your devices.
As always if you have any questions or feedback, feel free to leave a comment here or on my Youtube Channel. Thanks for watching
Mountain Lion Server: Profile Manager-Mac Enrollment
If you haven’t had a chance to view my previous tutorial on setting up Profile Manager start with that tutorial first by clicking HERE. In this screencast tutorial, I continue my look at Profile Manager and walk through how to set up your Macs to use the service. I cover how to install the needed certificates to allow your Macs to be managed and cover how they look once enrolled within Profile Manager.
If you have any questions feel free to leave a comment below or leave a comment on my YouTube Channel.
Mountain Lion Server: Caching Service
In this screencast tutorial I cover how to configure the Caching Service and set your clients to use that service instead of the Mac App Store. If you have any questions feel free to leave a comment below or on my YouTube Channel.
Mountain Lion Server: Software Update
In Mountain Lion Server Apple has included a local Software Update Service that allows you to download all of Apples’ updates to your server and then point your clients to your server to download those updates. In this screencast tutorial I cover how to set up the Software Update Service and how to point your client computers to use your Server instead of Apple’s Servers to get their updates.
If you have any questions along the way, feel free to leave a comment below or on my YouTube Channel.
Mountain Lion Server: Back Up
As always if you have any questions feel free to leave a comment here or on my YouTube Channel.
Mountain Lion Server: Mail
In this screencast tutorial I cover how to set up your own Mail Server. I go over the pros and cons of hosting your own email. I talk about the basic requirements of hosting your own server at home and how to set up your clients to use the service. As always if you have any questions feel free to leave a comment below or on my YouTube Channel.
Mountain Lion Server: FTP
In this screencast tutorial, I cover how to set up your own FTP share in Mountain Lion Server. I talk about how to log into your FTP share using Terminal and an FTP client.
As always if you have a question, feel free to leave a comment below or leave a comment on my YouTube Channel.
Mountain Lion Server: VPN
In the screencast tutorial below, I cover how to set up the VPN Service on Mountain Lion Server including how to set up the right range of addresses that won’t interfere with your regular DHCP range, which protocol to use (L2TP or PPTP), and ways in which you can export a profile to use to set up your client machines. I also cover setting up and connecting to your VPN Service remotely.
As always if you have any questions feel free to leave a comment below or on my YouTube Channel.
Mountain Lion Server: Messages
In this tutorial I cover how to set up the Messages Service and connect all your clients to the service. I also cover how to use the service and get your buddy list set up and running. If you have any questions along the way, feel free to leave a comment below or on my YouTube Channel.
Mountain Lion Server: Contacts
Mountain Lion Server: Calendar
As always, feel free to email any questions or leave a comment on my YouTube Channel.
Mountain Lion Server: Connect & Auto Mount AFP
If you have any comments or questions feel free to email or leave a comment on my YouTube Channel.
Mountain Lion Server: File Sharing
As always, if you have any comments or questions feel free to email, or comment on my YouTube Channel.
Mountain Lion Server: Users & Groups
As always if you have any questions, feel free to email or leave a comment on my YouTube Channel.
Mountain Lion Server: Profile Manager Set Up
In this tutorial I walk you through the steps of setting up the service which includes Apple’s Push Notification Certificate and SSL Certificates for secure connections between your server and your other devices. In future screencasts I will walk through each of the features available to manage and customize on your devices.
If you have any questions, feel free to email or comment on my YouTube Channel.
Mountain Lion Server: Open Directory
There are two ways to set up Open Directory in MLS. In this tutorial I walk through how to set up the service itself. It can also be set up by starting up Profile Manager, which checks to see if an Open Directory Master exists and if it doesn’t, then it walks you through the process of setting one up.
Let me know how you enjoy the screencast and feel free to email or leave a comment on my YouTube Channel if you have any questions or comments.
Mountain Lion Server: DNS
In this tutorial I cover how to set up your DNS and how to check to make sure your DNS is working properly. If you have any questions feel free to leave them here or reply on my Youtube Channel.
Mountain Lion Server: SSL Certificates
In this tutorial I cover how to set up a self signed SSL Certificate for Mountain Lion Server to allow you to have secure connections with your server. This is required if you are going to use Profile Manager and is recommended for things like Calendar, Address Book, Mail, etc. I also cover how to integrate a third party verified SSL Certificate and how to get that certificate added to your server.
As always if you have any questions or comments, feel free to leave them here or on my Youtube Channel.
Mountain Lion Server: Port Forwarding
Mountain Lion Server: Network Configuration
Mountain Lion Server: Install & Set Up
Mountain Lion Server: Upgrade From Lion Server
Guest Spot on ScreenCastsOnline

If you haven’t checked out ScreenCastsOnline and you are an Apple Computer user I highly recommend checking Don’s tutorials out as they are very well done and a great way to learn new ways to use your Mac. Click the screenshot below to check out my guest spot and to get a feel for the great service Don has to offer. Thanks for using my screencast Don and making it look even better to boot!
Home Server with Lion Server: VPN Server
In this screencast I cover which VPN protocol to choose, how to set an IP Range for your VPN Server, and how to install VPN manually on a client machine. I also show you how to connect to your VPN from a client computer and how to end your VPN session without having to use System Preferences. Enjoy!
Home Server with Lion Server: iChat Server
Home Server with Lion Server: iCal Server
Home Server with Lion Server: Address Book Server
Home Server with Lion Server: Connect & Auto Mount AFP
Home Server with Lion Server: File Sharing & Home Folders
Home Server with Lion Server: Users & Groups
When managing multiple users it can be time consuming if you have to make changes on a per account basis, so Lion Server has the ability to set up groups that allow you to make changes to the group that filters down to all the users in that group. That way you can set up groups for your kids or other groups that allows you to make those changes once that will affect everyone in that group.
In this screencast, I cover setting up users and groups in Lion Server. I cover how to determine the difference between a local and directory account, how to add new users and set the right permissions for services, and how to use groups to make changes once that affect all the users in the group. Building on this in Part 7, we will cover how to set up home accounts on the server.
Home Server with Lion Server: Profile Manager Set Up
In this tutorial, I cover how to set up Profile Manager. In the set up, Lion Server makes sure you have an Open Directory set up and your SSL Certificate in place (required for running Profile Manager). Open Directory allows you to manage global accounts and allows remote access as opposed to a local network directory which only allows local accounts. I am doing this tutorial early because Profile Manager sets up al the services required to run it without having to start each service separately. In a future screencast I will cover the web interface that is used to manage your devices and groups.
Home Server with Lion Server: SSL Certificates
In most cases you want an SSL Certificate from a trusted third party registrar who vouches for the identity of your server. You would want this type of certificate if you were hosting a business or a server that a lot of people from the outside world would be accessing. Since we are talking about a home server, the only people accessing your server are people in your household so you really don’t need to buy a certificate you can generate one within the Server.app which is called a self-signed certificate. This certificate still keeps your information secure and works just like a purchased certificate. The difference is that you will get a message when logging in the first time saying that the certificate is not validated by a third party and to make sure you know who generated the certificate. Once you check allow you won’t have to answer that question again and everything works behind the scenes.
In this screencast, I show you how to set up one of these certificates and get it installed on your server.
Home Server with Lion Server: Port Forwarding
If your router happens to be an Airport Extreme Base Station, you can have Server App manage your router for you, making sure all the necessary ports are open and allow access to the services you have configured. If you don’t have an Airport Extreme or would like to do your own port forwarding, you can do this in the software that came with your router. It will usually be referred to as NAT (Network Address Translation) and will have a section for you to add ports that you want to open up. For Lion Server, you can see a list of ports it uses for certain services HERE. Below is a tutorial I put together that explains port forwarding and how to do it both in the Airport Utility that comes with the Airport Extreme Base Station and through the Server App in Lion Server.
Home Server with Lion Server: Network Set Up
In this tutorial I walk you through the steps to assigning a static IP assigned to your server using an Airport Extreme Base Station. I also cover how to update the network settings on your server to make sure it is reading the right information. This is the second part of my home server tutorials and I’ll be following up with one on port mapping in the coming week.
MoneyWell 2.0: Event Based Budgeting

In this tutorial I cover the changes from version 1.7 of MoneyWell to it’s 2.0 version. I also cover the basics of using this software to set up a budget using an event based system which makes it far more flexible than the old version and saves a lot of time manually calculating what goes into each bucket category. I like the new system and think you will as well.
Money Management with MoneyWell 2.0
MoneyWell is not just a digital ledger for your finances, though it does that very well. It is also an envelope system at the same time. MoneyWell uses the analogy of buckets that you fill with money instead of envelopes. You set a budget based on your spending for different categories and MoneyWell lets you know how well you are doing against that budgeted amount. So you can actually see where your money is going instead of lamenting after the money is already gone. I have used this software for a few years now and I have really grown to love it.
Recently the developer of MoneyWell, Kevin Hoctor, put out a new update which changed the interface quite a bit. It really made it nicer to look at and updated it to the new Lion/iOS look and feel. Many people got upset and felt it was completely different and there was some uproar over at the Mac App Store about it. In and effort to show how the program is similar to old one and some of the things that have changed, I did this screencast. Hopefully it will help people to decide whether to upgrade or not. Personally, I like the new interface and some of the changes that were made. There are some things I would like to get back, but over all it has been a good upgrade for me.
Home Server with Lion Server: Set Up & Installation
Still with all of the improvements, this is still a server package and as a result has some complexity to it over what you may be used to with your current client software. To help you through the process of setting up and installing a home server, I am doing a series of screencasts on Lion Server to walk you through the process. This tutorial includes thinking through hardware, setting up a domain name if you want to access your server from outside your home, initial installation, and setting up your host name. All of this is done from the perspective of adding Server to your existing lion install not a new computer set up.
Slink: Remote Computer Management

Slink is a remote computer management program that is simple to use. You install the main management component on your computer. Then you install a small preference pane program on each of the computers you want to manage. You only pay for the management component which is currently $19.99 US in the Mac App Store. Once this is all set up, you add your relatives computers to your computer list and connect to those computers with a unique code that each has. Once you have those computers added, you only have to click the computer you want to connect with from a menubar drop down, plug in their password, and you are all set. The cool thing is it sets your computer up as if you are on the local network of the computer you are trying to help. That way you can share the screen and connect to any of the bonjour services that your relative may have running on their computer, including iTunes home sharing and iPhoto sharing.
It really is a neat package. I did a screen cast walkthrough on it which you can view below. The developer Olof is a really great guy and offers excellent support. If you are the IT department for your family you will find this tool indispensable!
iTunes Match Part 4-Troubleshooting
iTunes Match Part 3-Upgrading Your Music
iTunes Match Part 2-Understanding Your Match Results
iTunes Match Set Up Walkthrough
Uploading & Sharing Photos in Google+
Setting Up Your Profile Page on Google+
You can also follow all my screencasts at my Youtube Channel. Enjoy!
An Overview of Google+
You can also follow all my screencasts at my Youtube Channel. Enjoy!
SuperDuper!: Backing Up Multiple Drives to One
To help him see how to back up two drives to one, I put together a podcast to walk him through the process. The basic instructions on how to do this can be found in the manual for SuperDuper! found HERE. Enjoy!
Making the Move to iCloud
How to Set Up iCloud: http://www.apple.com/icloud/setup/
MobileMe Move Site: http://mobileme.com/move
Ooma Phone Service Review
In my search for the perfect solution I was chatting with a guy at my local Starbucks who said he had made the move to a VOIP phone company called Ooma. I decided to check it out and I am glad I did. Ooma is basically a voice over internet phone which means that it plugs into your existing internet connection and routes phone calls over the internet. So it is basically piggy backing off of your internet connection and therefore saves you from having to pay for phone calls (with the exception of international calls). Since many of us are paying for our broadband internet anyway this is a great way to leverage what you already have to get free phone service.
Getting Started
To get started with Ooma you need to buy an Ooma box. This box looks like any other phone machine and, in fact, includes a phone machine function. You plug the box into your router and then plug your existing phones into the Ooma box. Depending on the phones you have in your house you can use either wireless phones by plugging the main base station into the Ooma box and having that base station give the signal to the other wireless phones without having to plug into the wall. Or you can plug the Ooma into the wall and get smaller Ooma base stations, called Scouts or Telos, that you then plug into your phone sockets to allow for multiple phones in the house. I personally use a Panasonic wireless phone system with the main base station plugged into the Ooma with the other panasonic phones and chargers plugged in at various places in the house.

Getting Messages
You have access to your voicemail messages either from the Ooma box, from your phone if it has that feature, through the Ooma website, and you can even have Ooma text you when you have a phone message at home or pay $9.99 a month for a service that will transcribe your message to text and text or email it to you. On the website you can view your phone messages visually instead of going through them one at a time in a row, save messages, and organize them into folders. You can also see who has called in and who you have called and have a running record of phone numbers. There is a contact list you can add and with Premier you can add numbers to the global Blacklist that is constantly updated by other Ooma users. The web interface is a nice way to have your home phone and messages easily accessible while on the road.
Voice Quality
Now my biggest concern about Ooma was the voice quality. I have used other VOIP services and found that the voice quality was poor making me sound like I was in a tin can or had a lot of popping noises in the background. With Ooma I have been amazed at how good the phone quality has been. I have had friends and family tell me it sounded really good and I have not had any of the problems I have experienced with other VOIP services. It is really amazing how good the service is.
It Really is Free(or Really Cheap)
Now I know many of you are wondering, Is it really free after you buy the box? What’s the catch? Well that depends on how you use the service and what box you choose to get. If you get the older Ooma Hub and Scout combination than your service is completely free anywhere in the United States (you have to pay for international calls but the prices are quite good). If you get the newer Ooma Telo units you have to pay your monthly local taxes which are usually around $3-$5. I have the Ooma Hub and Scout and feel like I am not missing much with not having the Telo unit which includes HD voice, bluetooth connectivity for using your cell phone or wireless headset, and the ability to integrate your google voice account. The choice is yours but compared to what I was paying before the monthly taxes make this a huge bargain. So with me having the Hub and Scout combo I got my Ooma unit on sale for $180 and because I had wireless phones I sold the scout unit to the guy in the coffee shop for $50 which means I paid $130 out the door for free phone service for life. So in 3 months I had basically paid for the unit and have been enjoying free home phone service for the past year. If you are in the market for a home phone and are tired of having to look over a phone bill or cut your long distance calls short for fear of what your bill will look like, I would definitely consider Ooma. You won’t be sorry.
My Experience with Turbo Tax

Start Up
When you first start up Turbo Tax it asks if you want to import data from your previous year’s taxes. Since I had my 2009 Turbo Tax file on my computer the program found it and began to import it. Once it had finished the import and recent software updates it took me to the Personal Information Screen and there was all my personal data just as I had entered it last year including social security numbers. I love the fact that I did not need to look anything up to have to fill out the same information again. It was all imported for me.
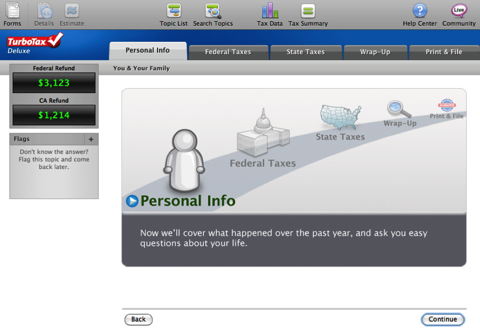
The Easy Wizard
From there Turbo Tax walks you through a series of questions that help you to determine what your income figures and deductions are. I love the fact that everything I had put in last year was already filled in for me. I just had to update my W2 forms and the actual numbers I received from all my financial institutions and figures from my wife’s home business. Everything was right there and the process was smooth.
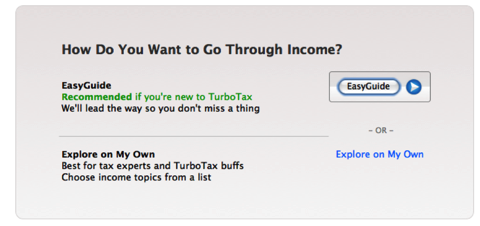
Error Check
Once you have put all your information in, the program checks to make sure nothing is missing or out of place. If it finds something that you are missing it comes back asking you questions to help you finish putting in anything my may have missed. If you get stuck and are not sure if you should fill in that information or want to know where it is on the form you can simply click the form button on the top left of the window and you are taken to a screen that shows all the forms that will be used on the left and an actual editable form on the right. Any form that is missing information has a red exclamation point next to it. Once you update that information the red exclamation point goes away letting you know you are all set. This adds confidence as you know the system is checking all the bases.
State Filing
The state filing was also very well put together and up to date. Everything from my Federal Tax form was transferred to my state form so I had very little to input. I live in a state that requires you to pay taxes on purchases you made out of state or on the internet. Turbo Tax had that information available for input complete with each counties tax rate making it easy to input. The same error correction that is available on the Federal tax portion was available for the state portion as well.
Print & E-File
When you are all done with your tax preparation you are asked if you are ready to file your taxes. Before you file you have the opportunity to review and print the actual tax forms. I usually save the files as pdf’s so have them with all of my other forms electronically. You are then asked if you want to e-file or mail your forms in. I choose e-file due to speed of my return. The E-file information is pre-filled out from last year including my bank information and how I paid for the state e-file last year. So all I had to do was confirm the information and send it off. The beauty of Turbo Tax is the fact that they update you every step of the process. You get an email telling you your returns were filed. You also get emails telling you the government accepted your return and have in their possession. You can then check where your return is in the process all the way to the point where your check is mailed. Pretty cool stuff!
Overall I am pleased with my experience with Turbo Tax. The ability to do my taxes myself in a couple of hours for a fraction of the price I was paying an accountant makes it a great deal. The software does a good job covering all the bases including my tax status as a Minister which has it’s own set of complexities. I would highly recommend it if you have a pretty straight forward tax situation and are tired of paying an accountant.
Setting Up Pathfinder to Work with Hyperspaces
Dual Pane File Browsing
Drop Stack
Tabs & Bookmarks
File List Sorting and Filtering
Command Line Tools
Quick Look Support
Application Launcher
There are other ways to customize the look and feel of Pathfinder as well. There is:
Dual Pane View
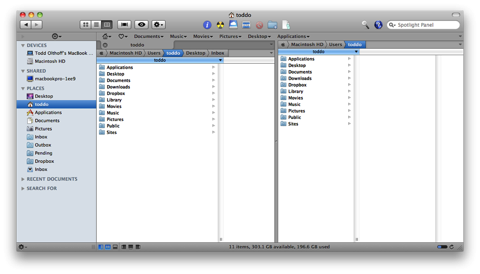
Cover flow View
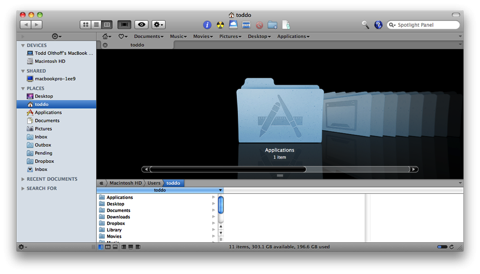
A Mix of Both Dual Pane and Coverflow
Pathfinder as Finder Replacement
Built into Pathfinder is the ability to replace most of Finder’s functions with Pathfinder. So when you open a folder it will bring up a Pathfinder window. Finder will still be running in the background because of the way it is built into the operating system but for everyday use Pathfinder will be the primary window that will be launched. To set this up, you go to the Pathfinder drop down menu and select “Show Pathfinder Desktop.”
Using Pathfinder with Hyperspaces
Now using both Pathfinder and Hyperspaces together causes some issues with which program gets priority on the desktop. To make these two programs work together do the following:
1. show the pathfinder desktop (path finder>Show Path Finder Desktop) 2. Bring the desktop forward (click on it and make sure it is the front most item). 3. Open the view option palette (view>Show view option or command J): you should see "show desktop options" at the top. 4. Click on the "set colors.." button, select Desktop in the drop down menu, and make sure that "show desktop background" is NOT checked. 5. Now you'll need to deactivate the Apple Finder's Desktop. In Path Finder, open (Pathfinder>Preferences) and switch to "General". Uncheck "hide Finder's Desktop" and relaunch the finder when asked (here I made sure "hide Finder's Desktop" was checked).
Setting Up Multiple Desktops
Hyperspaces

Dock Spaces
How it Works
When I turn on my Macbook Pro to do some work I go to each space to bring up the programs I want to use. So I will open my mail app in the Communications space, a Safari window in the Internet space, iTunes in the Audio space, etc. Then when I want to see my email I just click on the mail icon in the dock and it whisks me away to the Communications space and brings up the corresponding dock with all of my communications apps in the dock. Or, when I decide I need to look something up on the internet, I click on the Safari icon in my dock and it takes me to the internet space. This allows me to have full use of all of my spaces without having to juggle too many windows in one space. It also works seamlessly with another favorite app of mine Pathfinder. I can have the Pathfinder desktop activated and still have these multiple spaces and docks working.
How to Set It Up
To set all of this up, get a copy of Hyperspaces and install it. Then:
- Click the preferences pane.
- Click on the Spaces Icon.
- Decide how many spaces you want and add the columns and rows by clicking the plus button on the right.
- Label your space in the space name field.
- Click on the Label icon and if you want the name of the space on your desktop, check the box next to the On the Desktop line.
- On the Desktop diagram at the bottom, click where on the desktop you want the label to appear.
- Next, click the image button then click the magnifying glass to upload any image you want for that desktop. I usually choose “Fill Screen” for my scaling option.
- Repeat this for each space you want to set up.
To set up a dock for each space, get a copy of DockSpaces and install it. Then:
- Label the dock to be the same name as the space you want it to go to (this will simplify knowing which dock goes with what space).
- Add or remove any applications you want on that dock for that space.
- Repeat for each space you have.
- Click the Setup button and indicate how many rows and columns you have for your spaces. This will cause Dock Spaces to associate your docks with each space.
Now try clicking through your spaces and watch how the docks change for each space. It really works great and has made using my Macbook Pro an awesome experience. Enjoy!
New Back Up Strategy
Online Back Ups
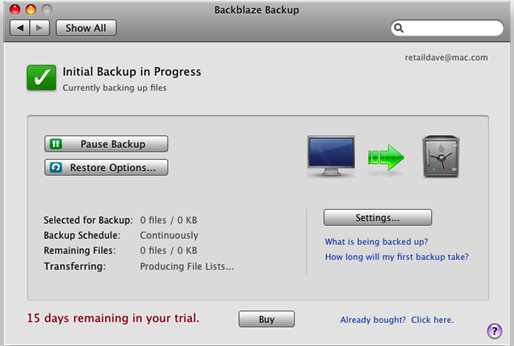
Local Back Ups
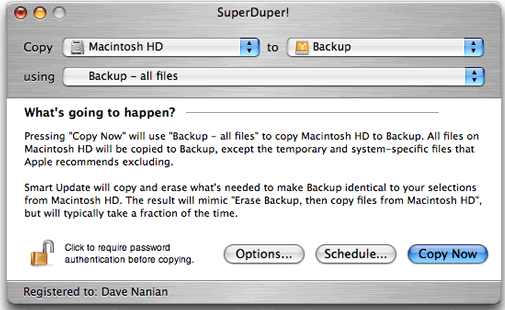
So that is my new backup strategy. I will write an update at some point to let you know how I like it but for right now I have a better back up strategy than I have ever had. My MacPro is handled and my laptop backs up wirelessly to an Aiport drive I have hooked up to my Airport Extreme. Now I can start the new year with confidence that I at least can get to my data if I need it. Next on the list is a ultra portable drive to do a clone of my laptop drive!
Using Airdisk as a Time Machine Backup
1. Reformat the Hard Drive
I took the 250GB drive I had connected to the Airport Extreme and attached it to my Macpro directly, Using Disk Utility I erased the drive and made sure it was Mac Os Extended (Journaled). If you want to set up partitions you can do so at the same time on the partition tab.
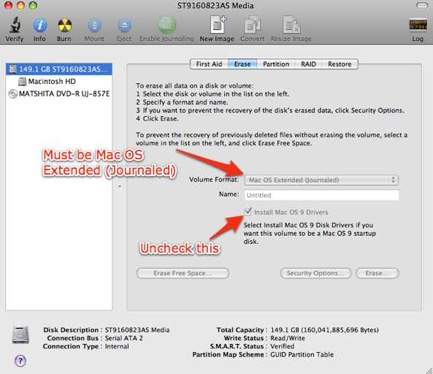
2. Plug the Drive Back Into the Airport Extreme and Mount it
Next I plugged the drive back into the Airport Extreme only, powered it up and waited for the Airport Extreme to show up in the shared section of the sidebar in the Finder. Once it showed up I clicked on it to mount it (if you have a password you will have to put in your password to get it to mount).
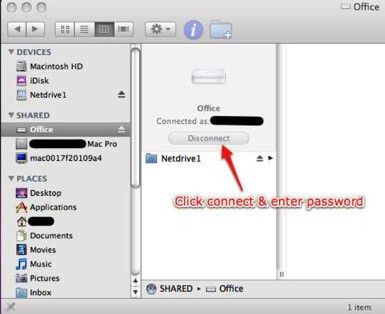
3. Add the Airdisk to the Devices Section of the Finder
Once the drive is mounted you have at make sure it shows up in the devices section of the Finder. Just click on the folder for your Airdisk drive and drag it to the Devices section. Once you do that it will show the drive with a new icon in the devices section. This will allow Time Machine to see the drive.
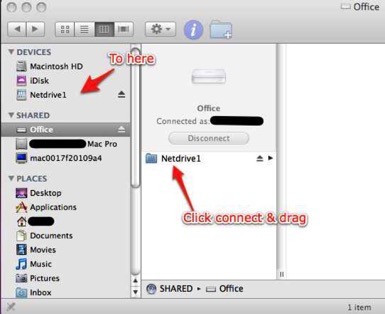
4. Make sure the Airdisk Shows up as a Device Every Time You Login
To make sure the airdisk always shows up when you login, go to System Preferences and click on Accounts. Once in Accounts (you may need to push the lock button in the bottom left corner and give your system login to unlock your preferences) click the tab that says login items. On the list that comes up, click the “+” sign in the bottom left of that window to add an item. Browse to the Airdisk you just added to devices and click add. You will now see it on the list of login items. Make sure the box next to it is checked so that you will automatically mount the Airdisk on login.
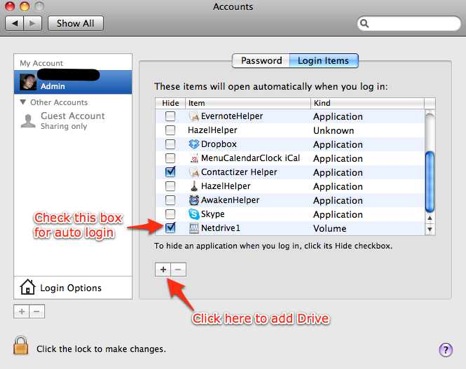
5. Set the Airdisk as your Time Machine Backup
Now go to System Preferences and click on the Time Machine Icon. On the Time Machine screen click Change Disk. You should now see your Airdisk in the list of available Time Machine Volumes. Select the Airdisk. Now Turn Time Machine on if you haven’t already and it will begin to prepare the disk for back up! Remember this will take a long time as you are doing the initial back up of your entire hard drive over the air. It took me 14 hours to back up 116GB of data. You may want to set your Energy Saver settings to not let your computer sleep while the backup is going on (System Preferences-Energy Saver-Set the time to sleep to never).